OEM 1997-2002 Sienna Steering Wheel Audio Control Install
![]() by minig646 » Mon Feb 23, 2015 7:36 pm
by minig646 » Mon Feb 23, 2015 7:36 pm
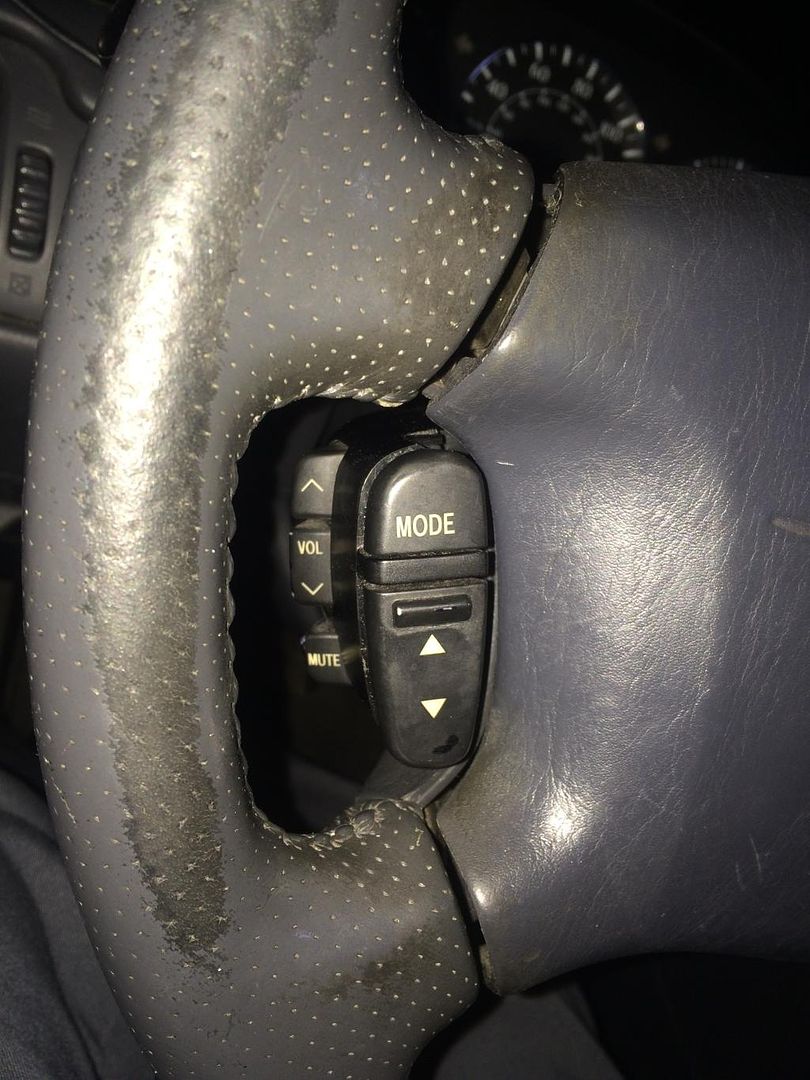
This was a project I've been thinking about doing for a long time. Finally finished and it looks and works great! Probably about $70 all in. Forgive the worn steering wheel- I'm sure a lot of you guys have the same issue!
It involves some rare parts, and is not for electrical novices. Soldering experience is a must, and a donor car at your local junkyard will save you a ton of hunting.
What you need:
~An aftermarket headunit, name brand preferably.
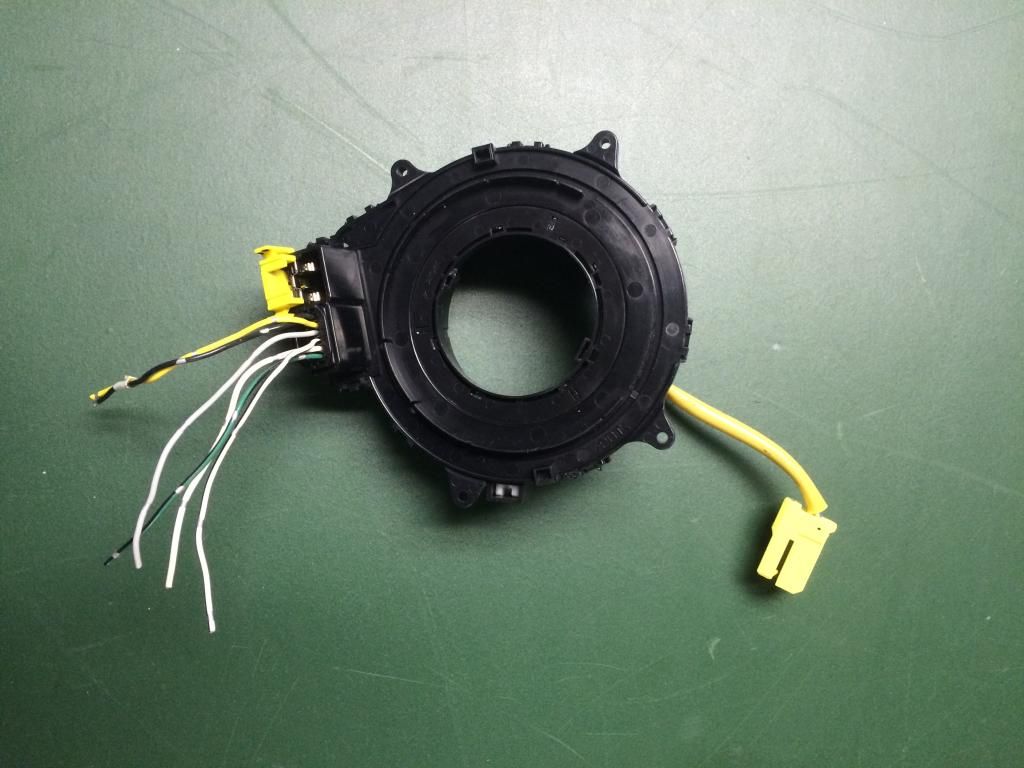
~Sienna Clockspring (the solara clockspring doesn't have enough pins. Take the whole steering wheel if it matches your interior! Save as much wiring as you can.)
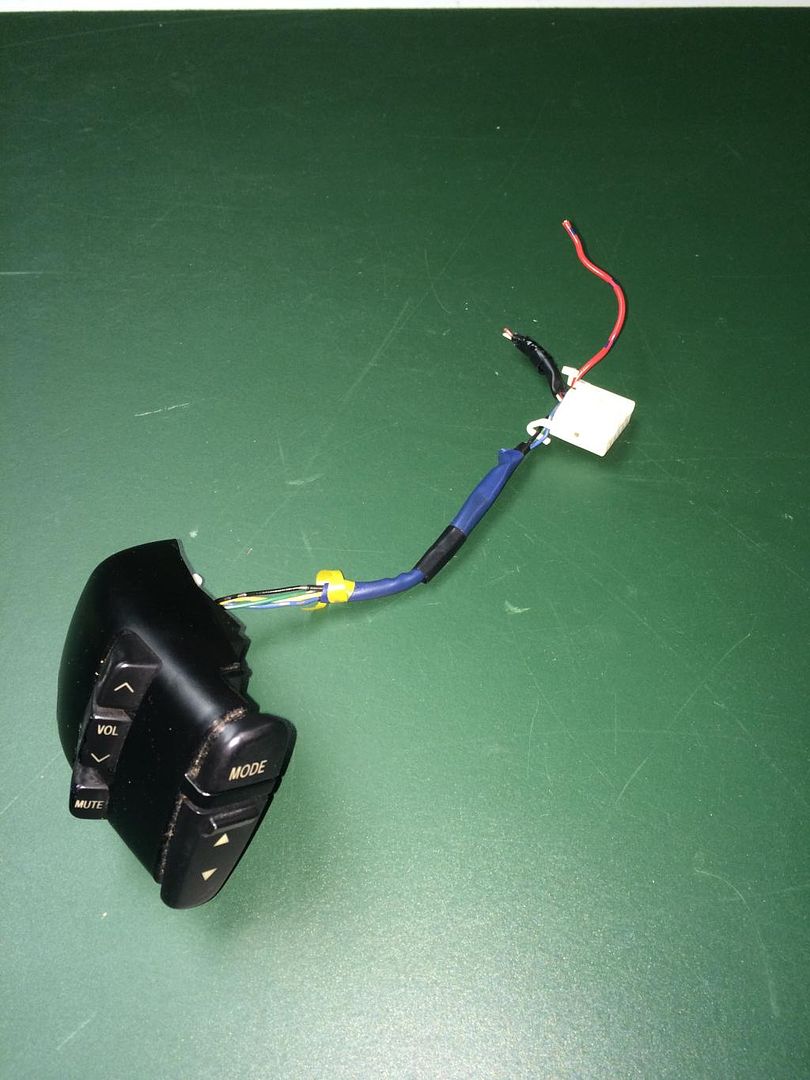
~Sienna Audio Controls (Again, save as much wiring as you can)
~Sienna Horn Bracket

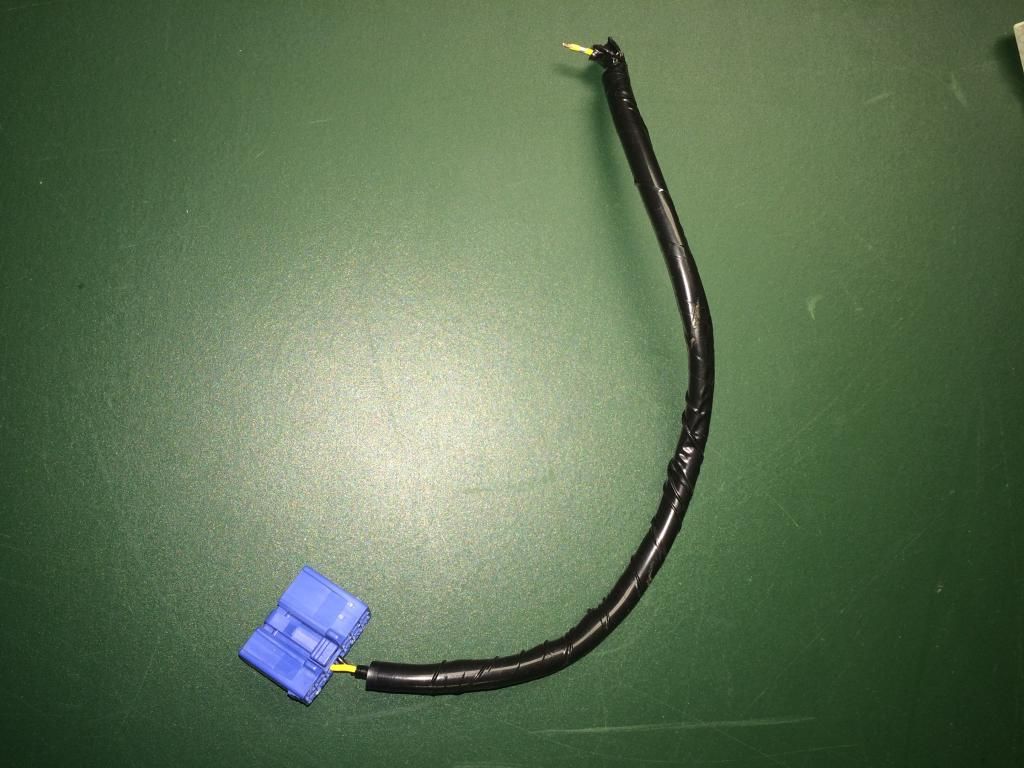
~2-pin plug that goes into the back of the Sienna head unit (not 100% necessary)
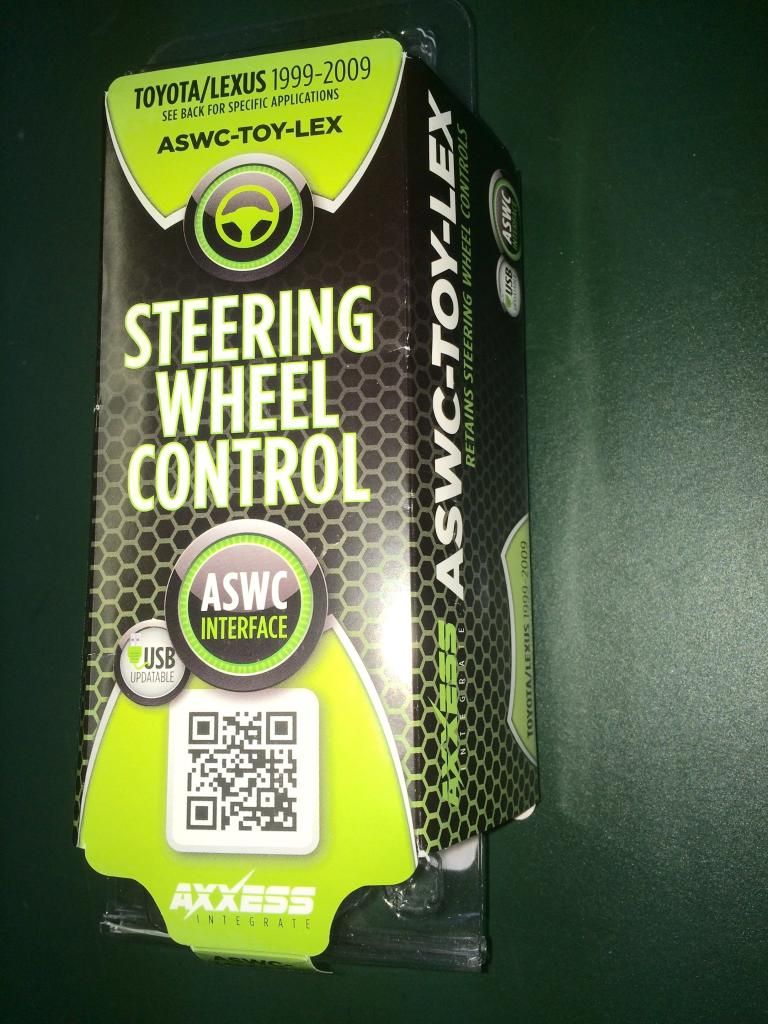
~Axxess ASWC-Toy-Lex Steering wheel control interface (discontinued and tricky to find- a universal one will NOT work)
Steps:
1. First you need to remove the airbag and steering wheel. Be safe. I'm not going into detail here, there are other tutorials for this.
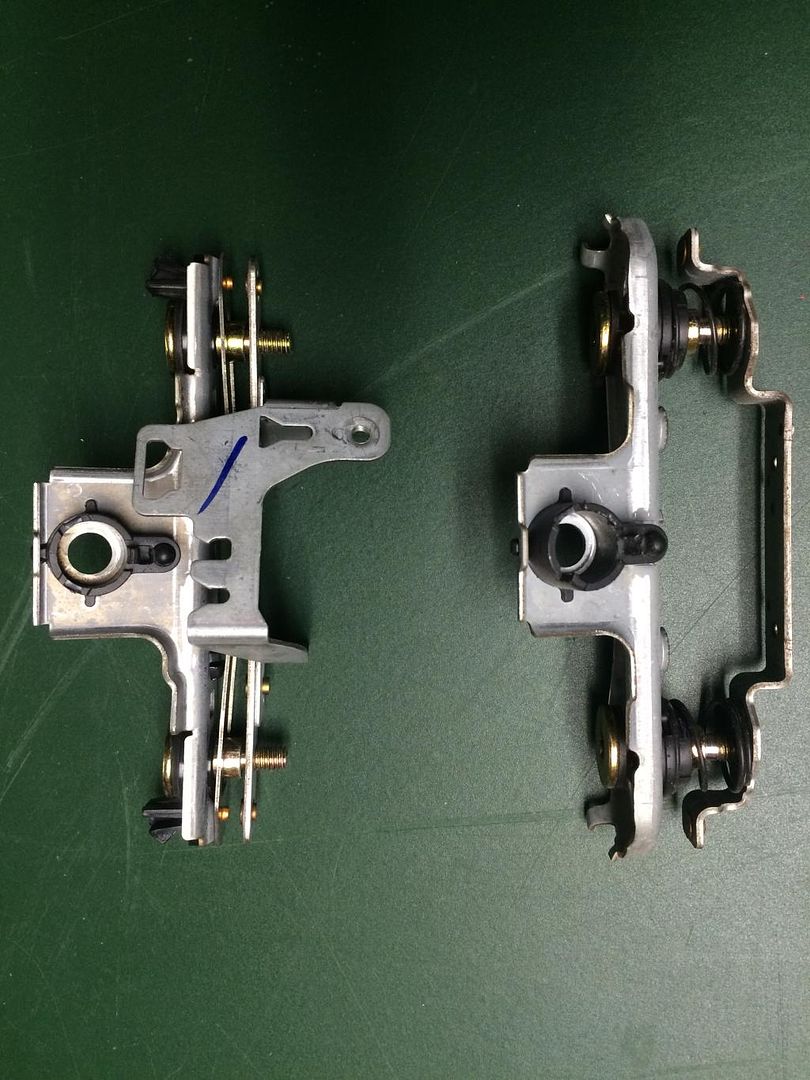
2. Disassemble the sienna horn bracket and grind the rivets that hold the side remote bracket onto the horn bracket. This will be transplanted onto the solara horn bracket- as you can see, the sienna bracket won't fit in the solara steering wheel. That's the first major challenge with this install.
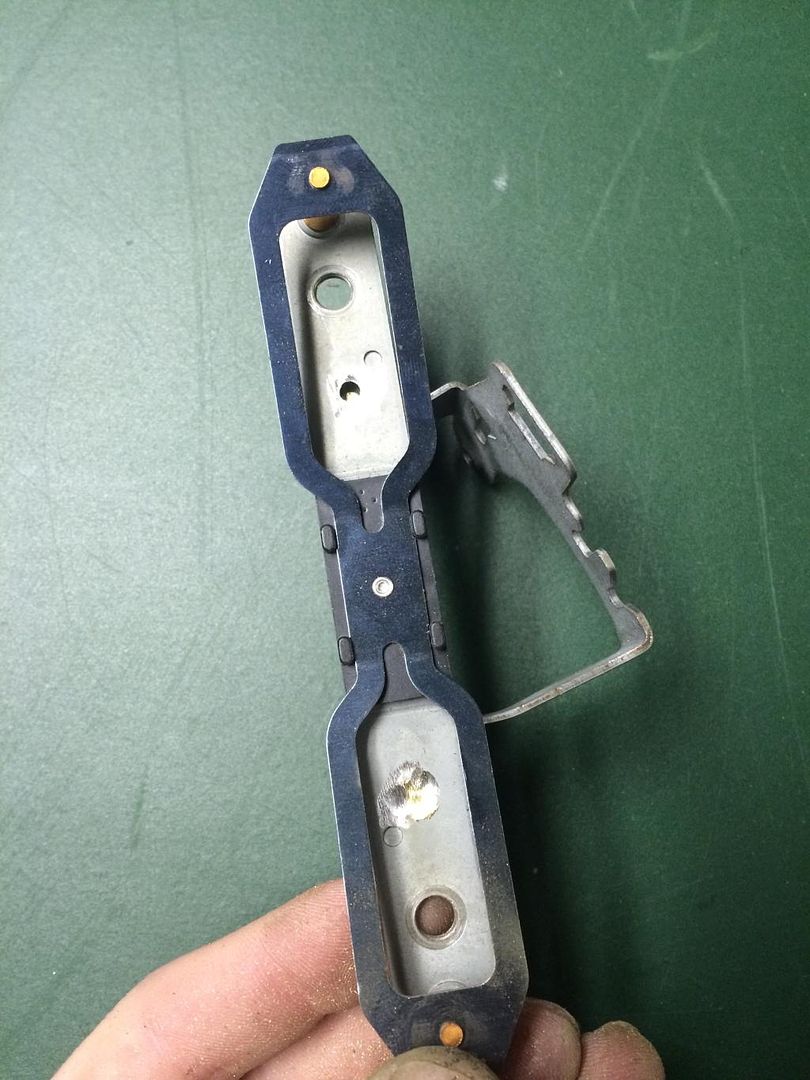
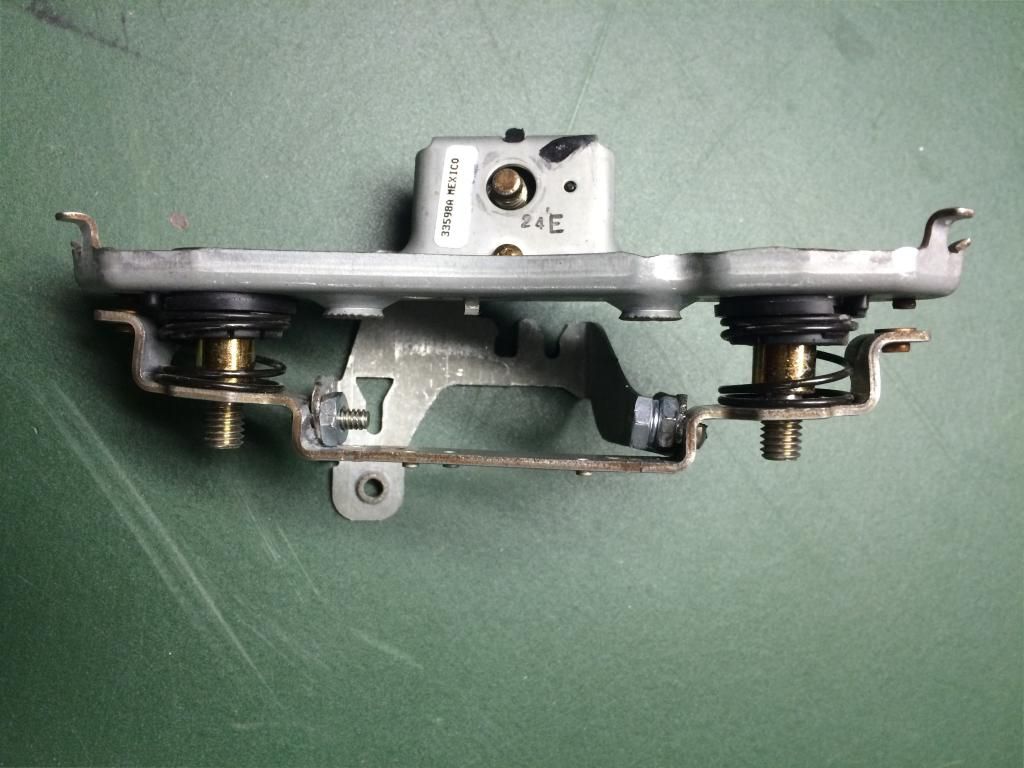
3. This is how I attached the remote bracket from the sienna to the solara horn bracket. Be creative, it takes trial and error and lots of test fits to get it right and depending on your fabrication skills you may take a different approach.
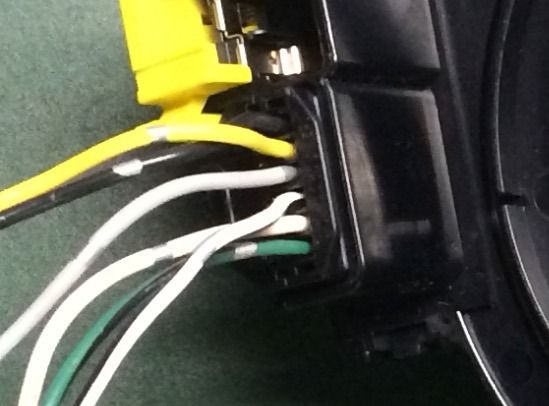
4. The airbag connector is a different shape, but the wire colors and functions are the same- so cut the yellow connector off the solara clockspring and solder it onto the sienna clockspring. Blue to blue, yellow to yellow. This splice MUST be soldered and properly insulated- obviously.
5. The wiring from the remote is:
Black: Switched 12V source
Blue: Ground
Yellow & Green: Signal wires
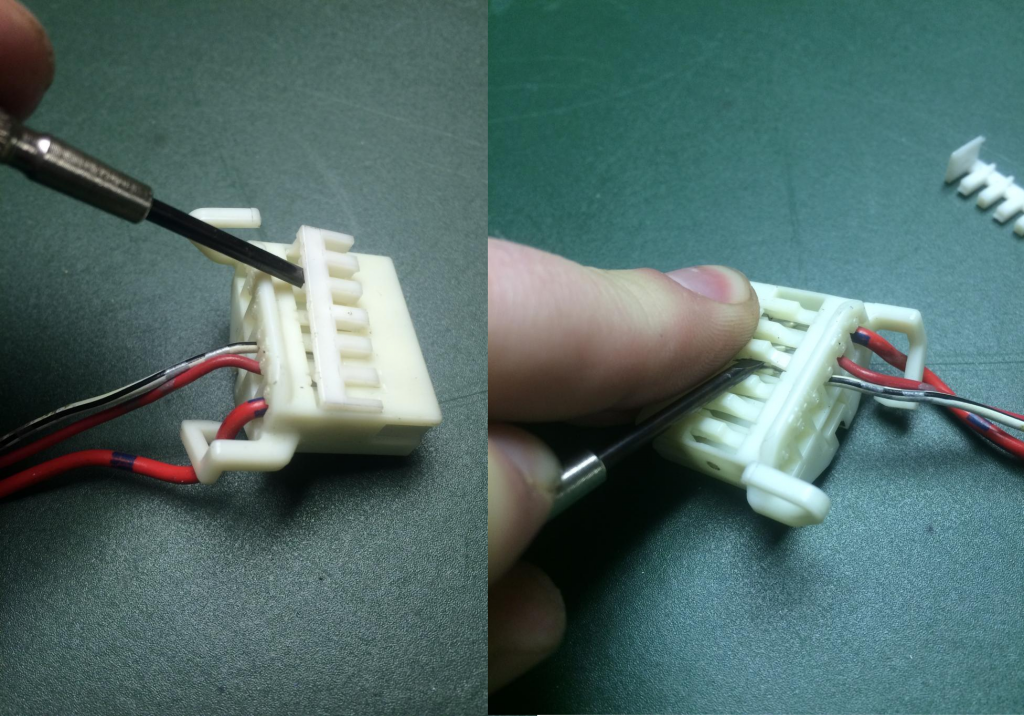
6. Remove the black and yellow wires from this connector on the sienna clockspring by extracting the the pins. Insert them into the corresponding connector on the solara clockspring. The solara connector is the same but has two open slots. This is how you remove the pins:
7. Remove the black and yellow wires from the black connector on the other side of the sienna clockspring. These are connected to the yellow and green signal wires from the remote. Insert them into the corresponding connector in the solara. It will have two open slots for you.
8. Ground the blue wire from the remote somewhere inside the steering wheel.
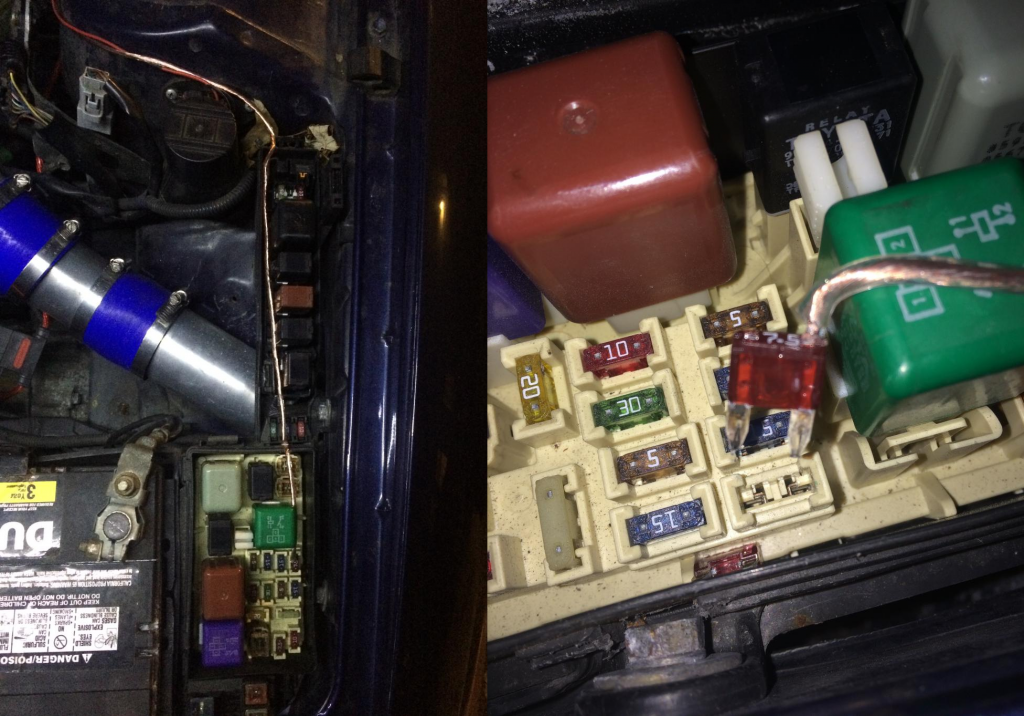
9. Now all the remote needs is 12 volts. The horn bracket is the only good 12V source in the steering wheel, and it doesn't turn off with the key so this option will kill your battery. This is the second challenge I faced. My solution was to rewire the horn at the fusebox under the hood so it loses power when you take the key out. I tapped into a switched 12V source from the interior fuse panel (I used the windshield wiper fuse, cigarette lighter fuse would also work) and ran the wire through the firewall to the engine compartment fusebox. Use fairly thick wire, as the horn draws about 4 amps. The result of this is that your horn and remote will lose power when the key is out.
10. I then used a blown fuse (you can make your own- figure it out) and soldered that wire to it, and inserted it in place of the horn fuse:
Now your remote should have power and ground. If you need your horn to work without the key for some reason, you can stick your old horn fuse back in and it will work normally.
11. Solder two extension wires to the yellow and black signal wires coming from the clockspring, and make the wires long enough to reach behind your head unit. Feed the wires through and solder them to the plug you took from behind the sienna head unit. This plug plugs into the Axxess interface kit. If you didn't take this connector, just cut the connector off of the Axxess interface and solder the wires straight on. If you get the two wires switched it won't work- so be prepared to swap them if your test run is unsuccessful.
12. Follow the instructions that came with the Axxess kit and reassemble everything. Mine worked on the first try! All buttons work.
It involves some rare parts, and is not for electrical novices. Soldering experience is a must, and a donor car at your local junkyard will save you a ton of hunting.
What you need:
~An aftermarket headunit, name brand preferably.
~Sienna Clockspring (the solara clockspring doesn't have enough pins. Take the whole steering wheel if it matches your interior! Save as much wiring as you can.)
~Sienna Audio Controls (Again, save as much wiring as you can)
~Sienna Horn Bracket
~2-pin plug that goes into the back of the Sienna head unit (not 100% necessary)
~Axxess ASWC-Toy-Lex Steering wheel control interface (discontinued and tricky to find- a universal one will NOT work)
Steps:
1. First you need to remove the airbag and steering wheel. Be safe. I'm not going into detail here, there are other tutorials for this.
2. Disassemble the sienna horn bracket and grind the rivets that hold the side remote bracket onto the horn bracket. This will be transplanted onto the solara horn bracket- as you can see, the sienna bracket won't fit in the solara steering wheel. That's the first major challenge with this install.
3. This is how I attached the remote bracket from the sienna to the solara horn bracket. Be creative, it takes trial and error and lots of test fits to get it right and depending on your fabrication skills you may take a different approach.
4. The airbag connector is a different shape, but the wire colors and functions are the same- so cut the yellow connector off the solara clockspring and solder it onto the sienna clockspring. Blue to blue, yellow to yellow. This splice MUST be soldered and properly insulated- obviously.
5. The wiring from the remote is:
Black: Switched 12V source
Blue: Ground
Yellow & Green: Signal wires
6. Remove the black and yellow wires from this connector on the sienna clockspring by extracting the the pins. Insert them into the corresponding connector on the solara clockspring. The solara connector is the same but has two open slots. This is how you remove the pins:
7. Remove the black and yellow wires from the black connector on the other side of the sienna clockspring. These are connected to the yellow and green signal wires from the remote. Insert them into the corresponding connector in the solara. It will have two open slots for you.
8. Ground the blue wire from the remote somewhere inside the steering wheel.
9. Now all the remote needs is 12 volts. The horn bracket is the only good 12V source in the steering wheel, and it doesn't turn off with the key so this option will kill your battery. This is the second challenge I faced. My solution was to rewire the horn at the fusebox under the hood so it loses power when you take the key out. I tapped into a switched 12V source from the interior fuse panel (I used the windshield wiper fuse, cigarette lighter fuse would also work) and ran the wire through the firewall to the engine compartment fusebox. Use fairly thick wire, as the horn draws about 4 amps. The result of this is that your horn and remote will lose power when the key is out.
10. I then used a blown fuse (you can make your own- figure it out) and soldered that wire to it, and inserted it in place of the horn fuse:
Now your remote should have power and ground. If you need your horn to work without the key for some reason, you can stick your old horn fuse back in and it will work normally.
11. Solder two extension wires to the yellow and black signal wires coming from the clockspring, and make the wires long enough to reach behind your head unit. Feed the wires through and solder them to the plug you took from behind the sienna head unit. This plug plugs into the Axxess interface kit. If you didn't take this connector, just cut the connector off of the Axxess interface and solder the wires straight on. If you get the two wires switched it won't work- so be prepared to swap them if your test run is unsuccessful.
12. Follow the instructions that came with the Axxess kit and reassemble everything. Mine worked on the first try! All buttons work.
2000 MR2 Spyder- SOLD
2000 SEV6- TOTALED
1999 Supercharged SLE V6
2000 SEV6- TOTALED
1999 Supercharged SLE V6
-

minig646 - Regular SolaraGuy Member

- Posts: 210
- Joined: Mon Jul 06, 2009 10:27 am
- Location: Philadelphia, PA