gen1.5 projector retro... New project coming soon!
![]() by xavier » Thu Jan 21, 2010 8:49 am
by xavier » Thu Jan 21, 2010 8:49 am
Update 3-20-2010
I have scrapped this project. The drivers side reflector cracked in half during some fine tuning and I threw in the towel. The FXR projectors will be donated to my Honda Fit. I have a new projector retrofit Im working on for the solara!
Update 3-4-2010
Finished remounting the projectors and I sealed em back up. I am still having a problem with the reflectors binding up in the housing preventing downward adjustment. I got them down as much as I could but I think they are still aimed too high.. Either way, they are good enough for now!
All pictures were taken with my phone so forgive the craptasticness of the photos!
On to pictures:


This is with the hid projector low beams and halogen high beams. I still havent wired my hid high beam solenoid...need diodes and relays and stuff

Update 3-1-2010
Well, just a quick update... I was adjusting the rotation of the projectors and popped the back of one of the reflectors...sooo...I cut a bunch more of the back of the reflector and made my own backing plates to mount the projectors on. This was waaay more work than I actually wanted to do and I'm still pretty far from being done but I have the rotation and alignment a whole lot better. Now I gotta figure out how to cover it all up (more mounting hardware visible along with epoxy). I am thinking of building a vacuum forming box this weekend and custom forming shrouds. Anyhow, heres some update beam pattern shots:

Passenger side is just a tad too high but thats an easy fix

Update 2-19-2010
Here is what it looks like on a flat wall currently. Will be doing some rotational adjustment and then take more pics. Then the diy writeup. Ive noticed alot more double takes and rubber necks from oncoming drivers though. Im very pleased with the results as is but I am thinking about 50w ballasts now...

Update 2-18-2010
Added beam pattern shots..passenger side it slightly off in rotation but Ill fix that up this weekend and lock everything down! Im happy with it...no to hook up the high beams!


Update 2-18-2010
Finalizing the setup. I still gotta take em apart to secure the shroud..


Update 2-7-2010
Almost done with number 2. Need to spray some flat black and then mount em and see what I got.


Update 2-2-2010
Tonight I changed the way the projector mounts. I was hoping to get rotational adjustability....but I failed. I did however get the cutoff level (I think) so Im happy. I put the whole thing back together looselyto see what it will look like. Bear in mind that the lens is my crap lens and I am acually doing all this on a different set of headlights (brand new). I am just getting my "process" down so I know what to do for the good set of lights. Anyhow...

Update 2-1-2010
Took the tape off, trimmed the shroud, and mocking it back up. So far so good but I have a feeling I am going to have a slightly crooked cutoff. I wont know till its on the car. (Its going on the car before I seal it back together so I can shim a side if needed)


Update 1-31-2010
Distance shots added. These are shots of 1 at roughly 35'. Beautiful!! I'm loving that thick purple band at the cutoff! Im not the best photog either...


Update 1-31-2010
Finally got projector 1 mounted with the shroud ready to be attached. Not sure how I am going to attached the shroud so I havent yet but I am thinking some liquid steel or high temp rtv/silicone.
ANyhow, after a day or so of trying to design a rotational mounting system, I gave up and mounted the projector through the back of the reflector. I am using 2 mounting bolts for now (have to get some more from Lowes). This is just a temporary mount as I'm going to take it off and mask everything for flat black paint and then remount it.
I'm pleased with my progress so far and the freaking cold weather has allowed me to take my time. Not gonna isntall and aim in 17 degree weather. I'm also deciding on whether to paint the inner cutoff shield a bright high temp yellow or red...


Update 1-28-2010
Fired up the FXR's with my modified atx computer power supply. Man I love light. Amazing color at the cutoff!! There is intense purple in the center (roughly 8" high at 25') and red/yellow on the sides of the cutoff. My camera sucks so it doesnt do it justice. Just making sure both ballasts and bulbs fire correctly before I start mounting. Both highbeam solenoids work too. Forgive my messy bedroom and my dog that is waiting for my wife to come out of the bathroom. lol


Update 1-27-2010
Started to mock up the shroud placement


 [/b]
[/b]
Well, I figured I'd start my projector retro thread. Its going to take some time as I want to do it right.
Heres my parts list: (all parts came from theretrofitsource.com)
FX-R projectors
New 5000k morimoto D2S bulbs
New morimoto 35w ballasts
E46 Replica Shrouds
Wiring Harness
diodes
So I am still batting around a mounting method. Rather than mounting the projector to the reflector via 4 long screws, I'd rather make a mounting plate that the projector can mount to and jb weld the mounting plate to the projector but I'm still thinking.
Here's a couple pictures of the size of the projector compared to the stock (uncut) reflector.


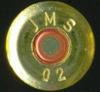
And here is the ballast
 [/img]
I have scrapped this project. The drivers side reflector cracked in half during some fine tuning and I threw in the towel. The FXR projectors will be donated to my Honda Fit. I have a new projector retrofit Im working on for the solara!
Update 3-4-2010
Finished remounting the projectors and I sealed em back up. I am still having a problem with the reflectors binding up in the housing preventing downward adjustment. I got them down as much as I could but I think they are still aimed too high.. Either way, they are good enough for now!
All pictures were taken with my phone so forgive the craptasticness of the photos!
On to pictures:
This is with the hid projector low beams and halogen high beams. I still havent wired my hid high beam solenoid...need diodes and relays and stuff
Update 3-1-2010
Well, just a quick update... I was adjusting the rotation of the projectors and popped the back of one of the reflectors...sooo...I cut a bunch more of the back of the reflector and made my own backing plates to mount the projectors on. This was waaay more work than I actually wanted to do and I'm still pretty far from being done but I have the rotation and alignment a whole lot better. Now I gotta figure out how to cover it all up (more mounting hardware visible along with epoxy). I am thinking of building a vacuum forming box this weekend and custom forming shrouds. Anyhow, heres some update beam pattern shots:
Passenger side is just a tad too high but thats an easy fix
Update 2-19-2010
Here is what it looks like on a flat wall currently. Will be doing some rotational adjustment and then take more pics. Then the diy writeup. Ive noticed alot more double takes and rubber necks from oncoming drivers though. Im very pleased with the results as is but I am thinking about 50w ballasts now...
Update 2-18-2010
Added beam pattern shots..passenger side it slightly off in rotation but Ill fix that up this weekend and lock everything down! Im happy with it...no to hook up the high beams!
Update 2-18-2010
Finalizing the setup. I still gotta take em apart to secure the shroud..
Update 2-7-2010
Almost done with number 2. Need to spray some flat black and then mount em and see what I got.
Update 2-2-2010
Tonight I changed the way the projector mounts. I was hoping to get rotational adjustability....but I failed. I did however get the cutoff level (I think) so Im happy. I put the whole thing back together looselyto see what it will look like. Bear in mind that the lens is my crap lens and I am acually doing all this on a different set of headlights (brand new). I am just getting my "process" down so I know what to do for the good set of lights. Anyhow...
Update 2-1-2010
Took the tape off, trimmed the shroud, and mocking it back up. So far so good but I have a feeling I am going to have a slightly crooked cutoff. I wont know till its on the car. (Its going on the car before I seal it back together so I can shim a side if needed)
Update 1-31-2010
Distance shots added. These are shots of 1 at roughly 35'. Beautiful!! I'm loving that thick purple band at the cutoff! Im not the best photog either...
Update 1-31-2010
Finally got projector 1 mounted with the shroud ready to be attached. Not sure how I am going to attached the shroud so I havent yet but I am thinking some liquid steel or high temp rtv/silicone.
ANyhow, after a day or so of trying to design a rotational mounting system, I gave up and mounted the projector through the back of the reflector. I am using 2 mounting bolts for now (have to get some more from Lowes). This is just a temporary mount as I'm going to take it off and mask everything for flat black paint and then remount it.
I'm pleased with my progress so far and the freaking cold weather has allowed me to take my time. Not gonna isntall and aim in 17 degree weather. I'm also deciding on whether to paint the inner cutoff shield a bright high temp yellow or red...
Update 1-28-2010
Fired up the FXR's with my modified atx computer power supply. Man I love light. Amazing color at the cutoff!! There is intense purple in the center (roughly 8" high at 25') and red/yellow on the sides of the cutoff. My camera sucks so it doesnt do it justice. Just making sure both ballasts and bulbs fire correctly before I start mounting. Both highbeam solenoids work too. Forgive my messy bedroom and my dog that is waiting for my wife to come out of the bathroom. lol
Update 1-27-2010
Started to mock up the shroud placement
[/b]
Well, I figured I'd start my projector retro thread. Its going to take some time as I want to do it right.
Heres my parts list: (all parts came from theretrofitsource.com)
FX-R projectors
New 5000k morimoto D2S bulbs
New morimoto 35w ballasts
E46 Replica Shrouds
Wiring Harness
diodes
So I am still batting around a mounting method. Rather than mounting the projector to the reflector via 4 long screws, I'd rather make a mounting plate that the projector can mount to and jb weld the mounting plate to the projector but I'm still thinking.
Here's a couple pictures of the size of the projector compared to the stock (uncut) reflector.
And here is the ballast
[/img]Last edited by xavier on Sat Mar 20, 2010 7:29 am, edited 24 times in total.
-

xavier - SolaraGuy Street Racer

- Posts: 1161
- Joined: Wed Jan 26, 2005 6:03 pm
- Location: Lancaster, PA