Sport spoiler install!!! (from PXLpainter's car)
![]() by ctsolara12 » Fri Aug 28, 2009 9:26 pm
by ctsolara12 » Fri Aug 28, 2009 9:26 pm
So, here's some background to this install... I never had a spoiler on my car, but ever since I bought it, I've wanted to get one to lift up the looks of the rear a little.
I ended up purchasing PXLpainter's sport spoiler, since I liked it's looks and uniqueness. Tough part was, I had no template to drill the holes, so I had to do something creative (which you will see in the images below).
After just over 6 hours of work, I got it installed!!! I'll take you through a shortened version of that below...
First, I made a template out of cardboard using the curvature of the spoiler. I checked the placement at least 20 times to make sure that the middle hole was in the correct spot before drilling, since it was the most important.

After drilling the middle hole, I inserted the pin that's part of the spoiler into it, placed clay on the trunk in the general areas of the bolts, and pressed on it firmly.

I then Drilled the rest of the holes and painted the edges to protect the bare metal.

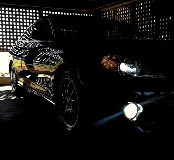
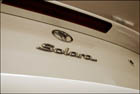
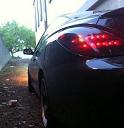
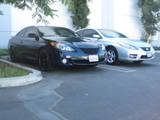
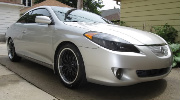
Now the images below show what the final product looks like, and I have included some "BEFORE" pictures if you wish to compare.


The spoiler ended up fitting perfectly with the holes I drilled, and I also put a little double sided tape behind it on the top corners.
I love it!!! The rear of the car no longer looks like it sags down lol.
I ended up purchasing PXLpainter's sport spoiler, since I liked it's looks and uniqueness. Tough part was, I had no template to drill the holes, so I had to do something creative (which you will see in the images below).
After just over 6 hours of work, I got it installed!!! I'll take you through a shortened version of that below...
First, I made a template out of cardboard using the curvature of the spoiler. I checked the placement at least 20 times to make sure that the middle hole was in the correct spot before drilling, since it was the most important.
After drilling the middle hole, I inserted the pin that's part of the spoiler into it, placed clay on the trunk in the general areas of the bolts, and pressed on it firmly.
I then Drilled the rest of the holes and painted the edges to protect the bare metal.
Now the images below show what the final product looks like, and I have included some "BEFORE" pictures if you wish to compare.
The spoiler ended up fitting perfectly with the holes I drilled, and I also put a little double sided tape behind it on the top corners.
I love it!!! The rear of the car no longer looks like it sags down lol.
-

ctsolara12 - Just Licensed SolaraGuy
- Posts: 47
- Joined: Tue Mar 11, 2008 8:50 pm
- Location: Maryland