[phpBB Debug] PHP Notice: in file /viewtopic.php on line 988: date(): It is not safe to rely on the system's timezone settings. You are *required* to use the date.timezone setting or the date_default_timezone_set() function. In case you used any of those methods and you are still getting this warning, you most likely misspelled the timezone identifier. We selected 'Europe/Moscow' for 'MSD/4.0/DST' instead
[phpBB Debug] PHP Notice: in file /viewtopic.php on line 988: getdate(): It is not safe to rely on the system's timezone settings. You are *required* to use the date.timezone setting or the date_default_timezone_set() function. In case you used any of those methods and you are still getting this warning, you most likely misspelled the timezone identifier. We selected 'Europe/Moscow' for 'MSD/4.0/DST' instead
SolaraGuy.com • View topic - CP-e extension V6 - DONE w/ pics
Talk about aftermarket Toyota Solara Gen 2 and 2.5 upgrades.

CP-e extension V6 - DONE w/ pics

CP-e extension V6 - DONE w/ pics

Postby Sebas007 » Tue Jul 17, 2007 9:15 pm

EDIT : See further down the page to see my Phase #1...
EDIT : See further down the page to see my Phase #2...
EDIT : See further down the page to see my Phase #3...
EDIT : See the DIY thread
EDIT : I finally solve my electric problem + CP-e extension PAGE 3
http://www.solaraguy.org/viewtopic.php?t=34705

Hi guys,

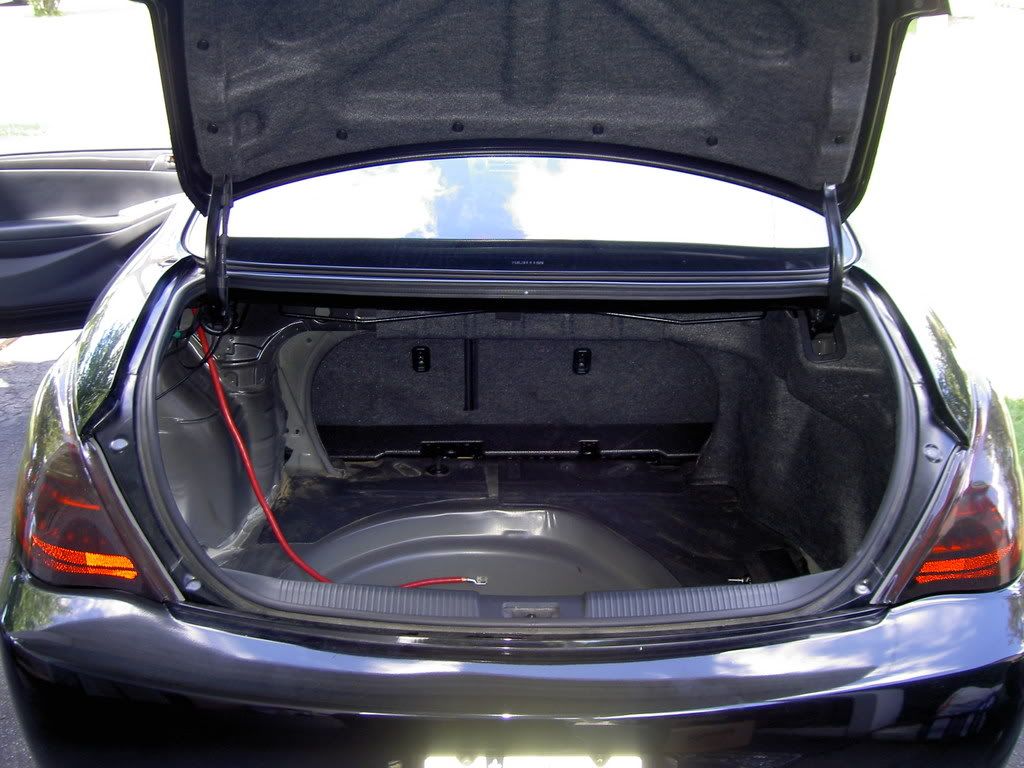
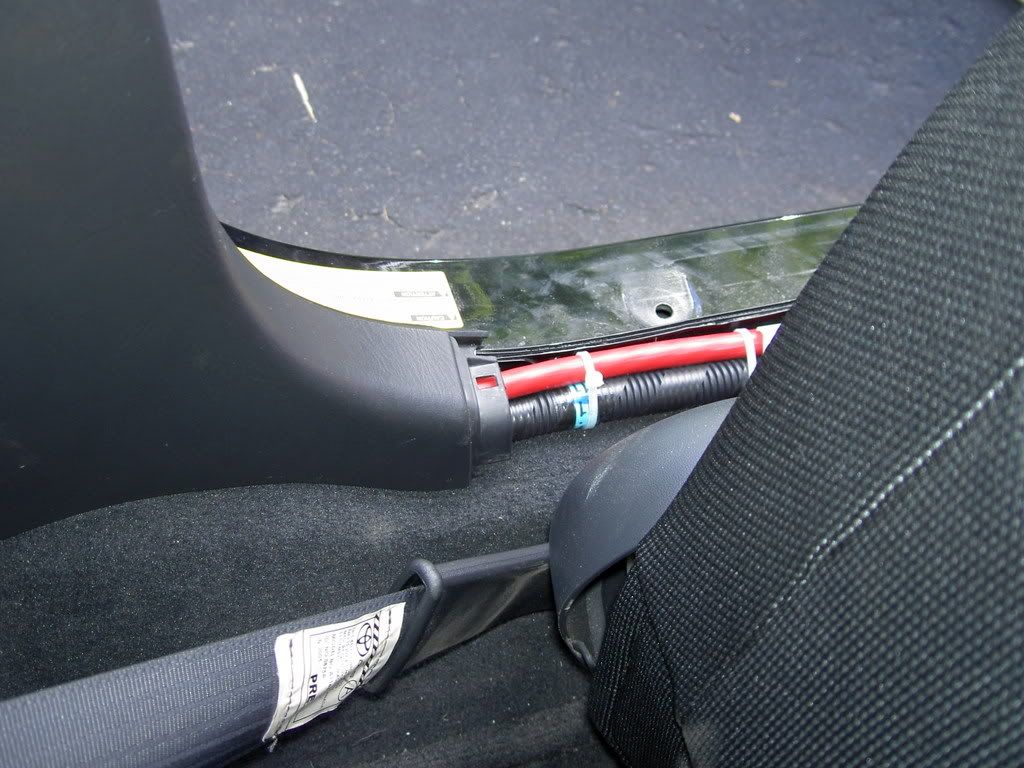
need help from guys who did a battery relocation or know the wiring to do. First I thought I would have to plug the battery positive on the alternator. I checked again and in stock mode...the battery positive go to the starter and a little wire from the positive go in the fuse box. The ground is screwed near the starter too. I'm just wondering now what to do because the alternator must have a link to the battery...but I don't see it.

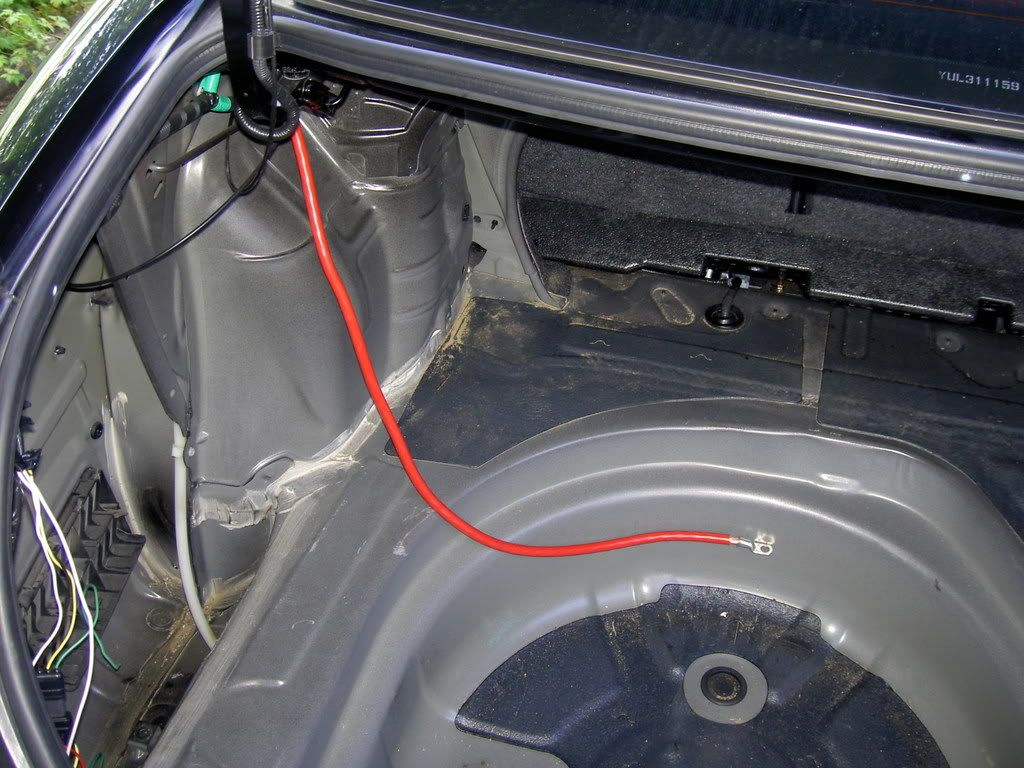
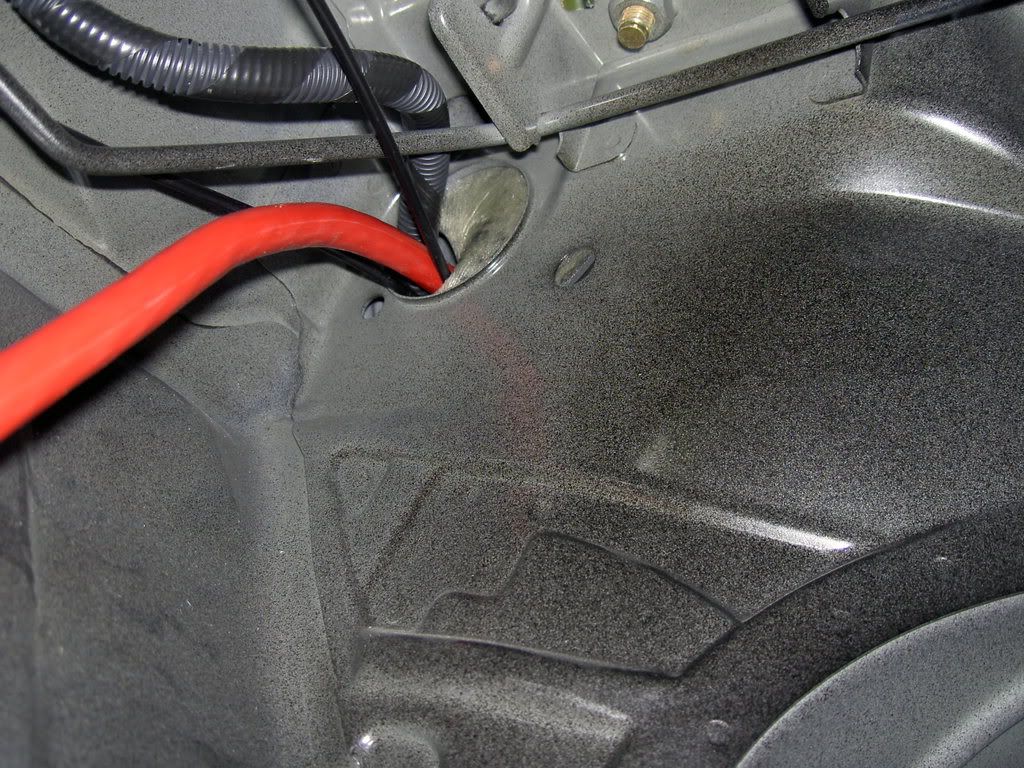
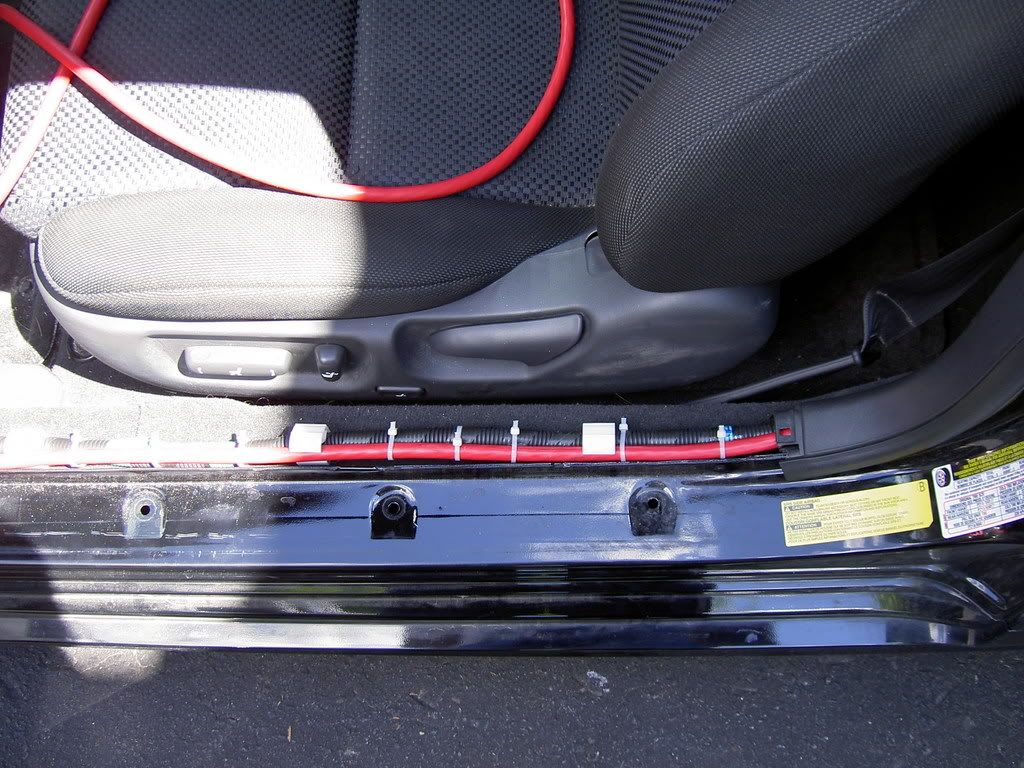
What would be the way to route my wire from the trunk to simulate the same thing as stock mode ??? If no one can help me on this...I'll give up the idea....so no cold air extension. :S


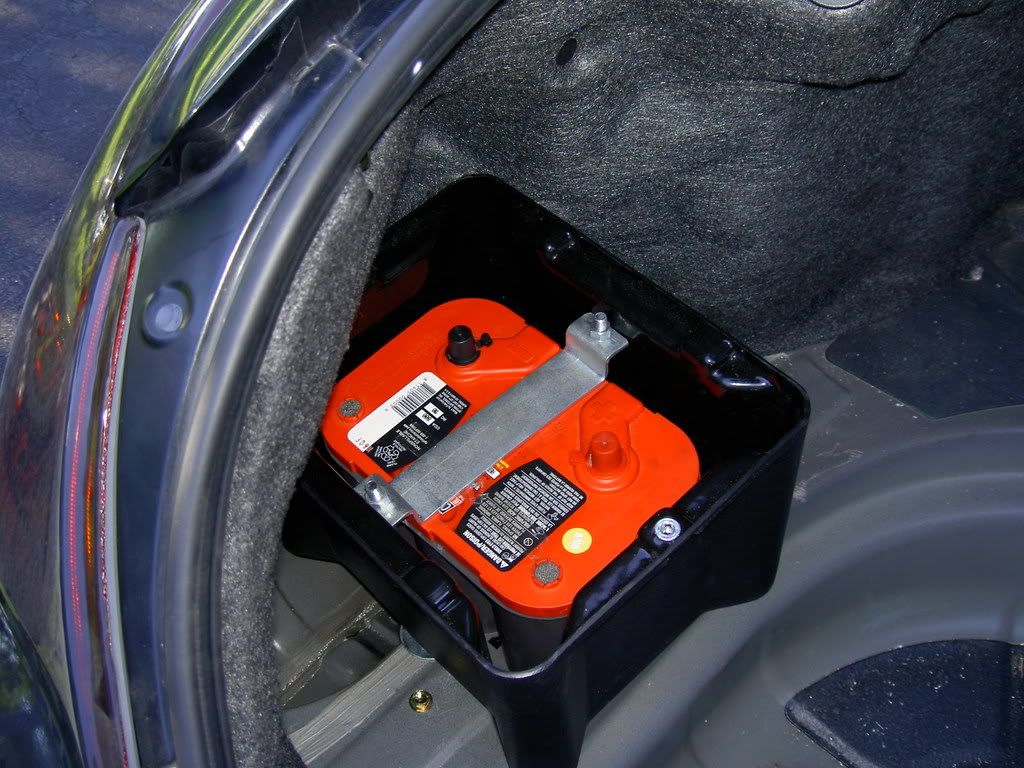
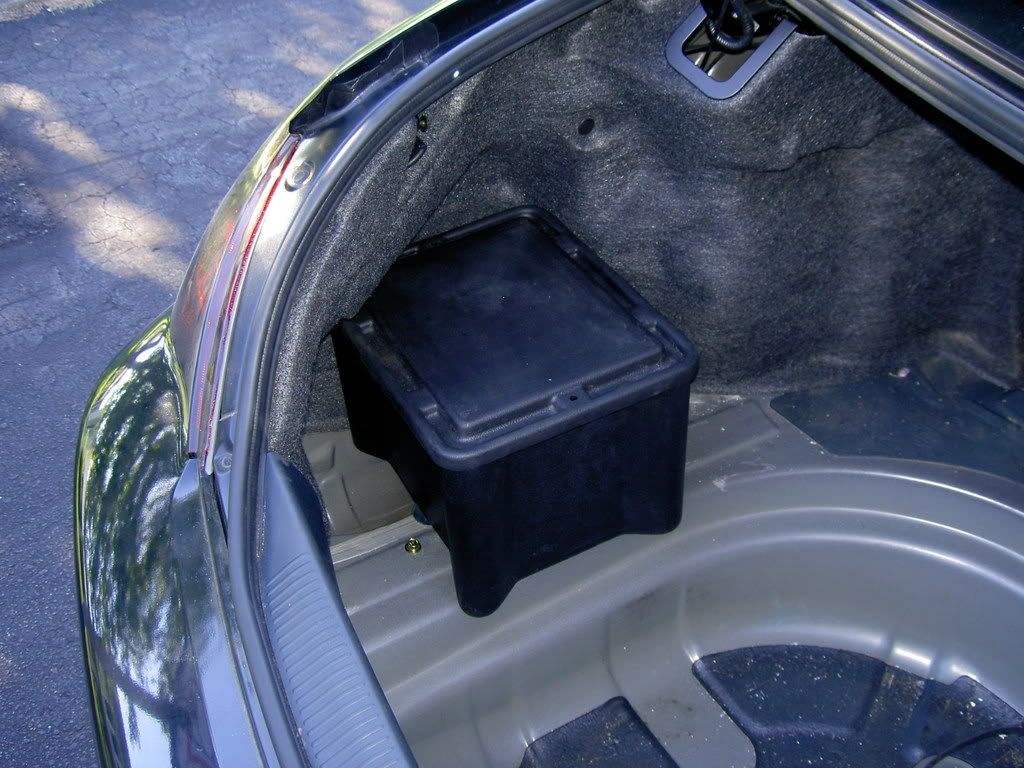
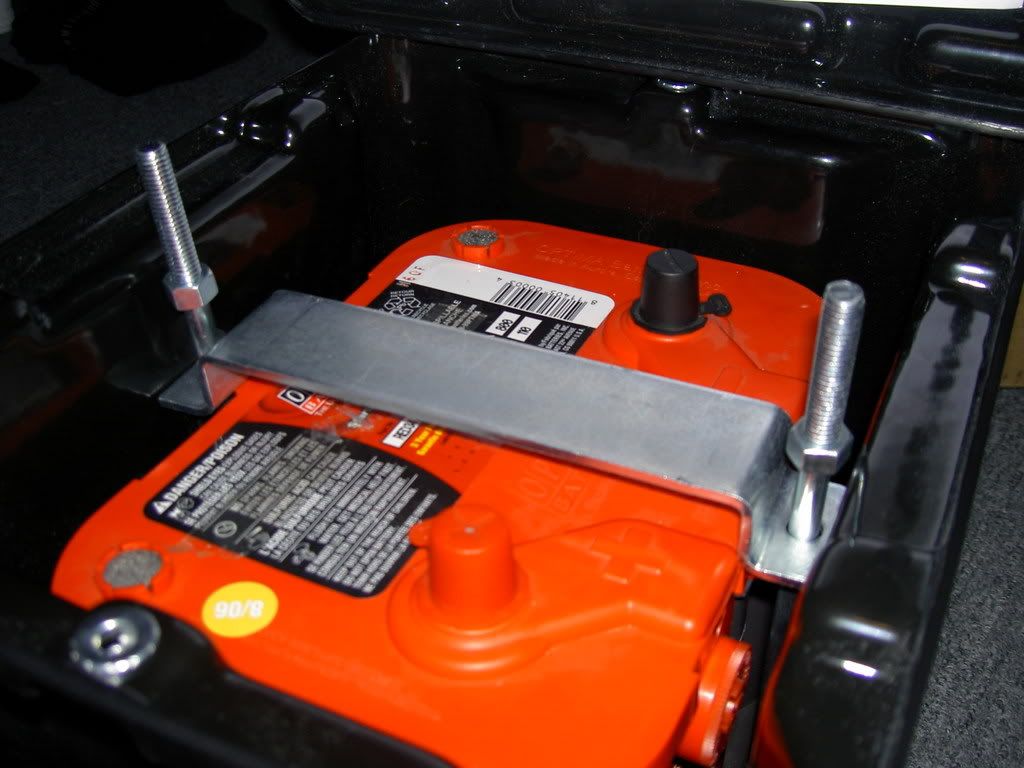
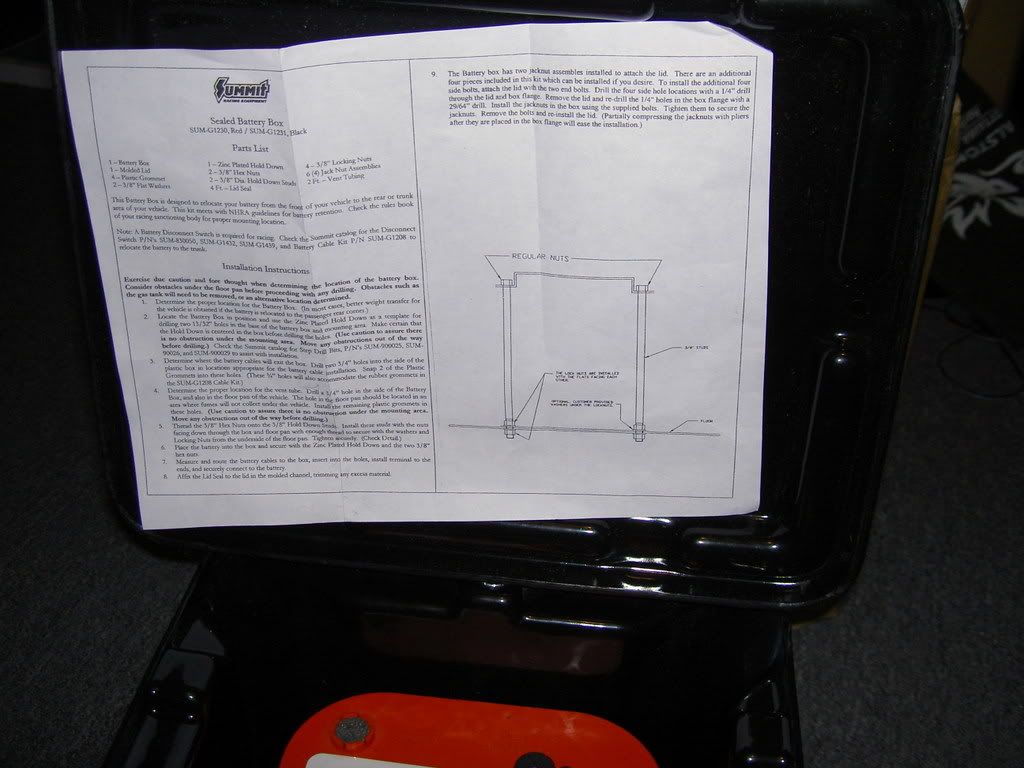
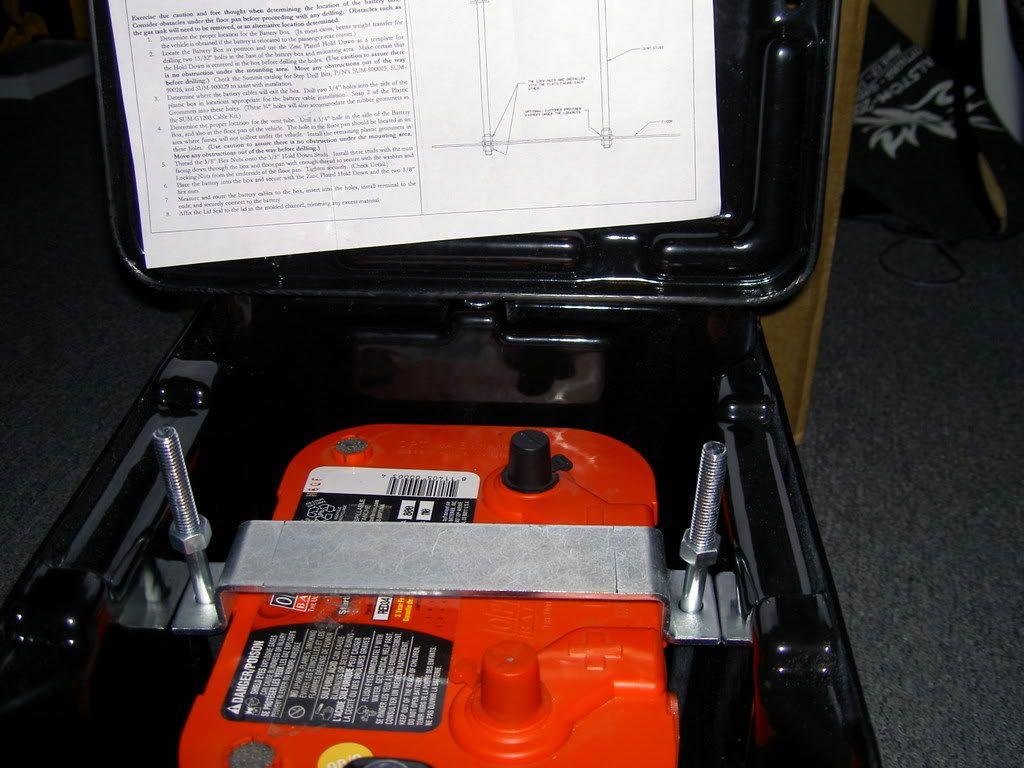
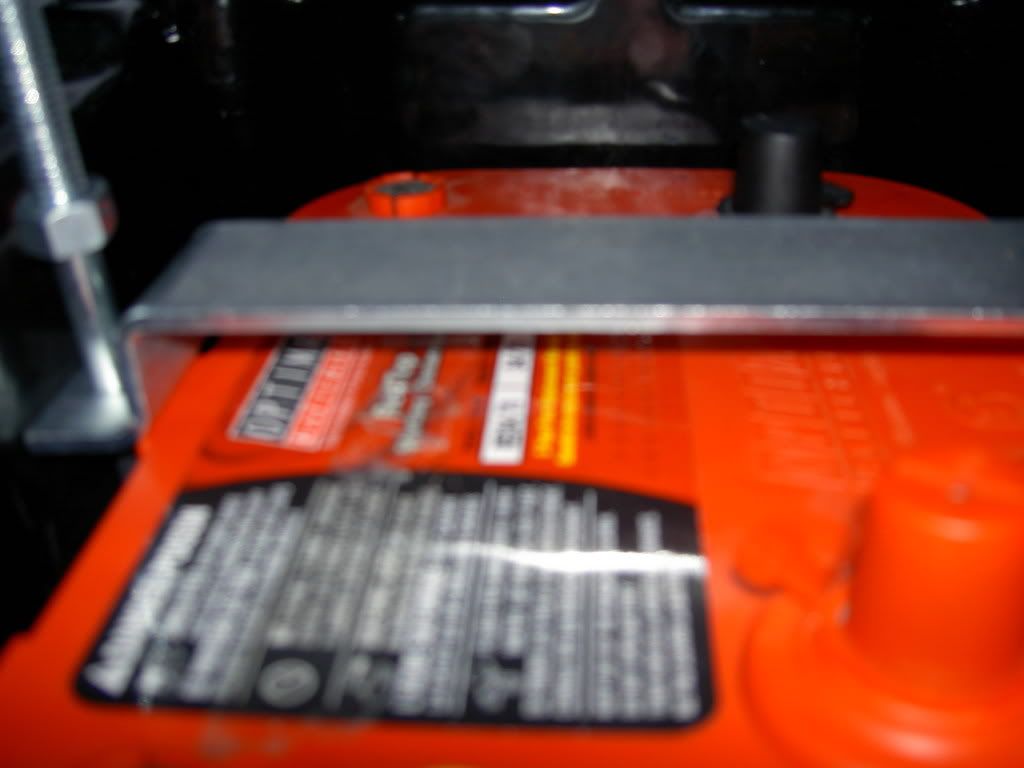
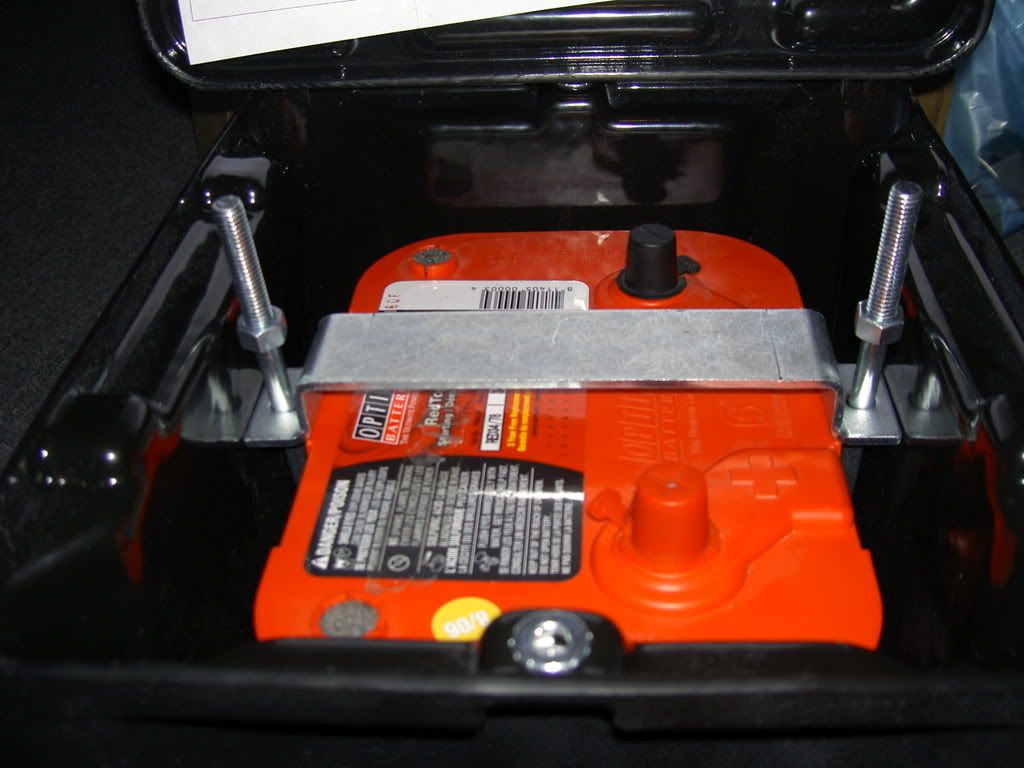
Not the only problem...bought a relocation kit from Summit Racing...the Optima redtop battery (group 34/78 ) ...the hold won bracket is just too short to sit properly !!!! :evil: Would have to put in upside-down and do so customisation with wood or so...to stuck the battery.


Image

Image

Image

Image

Image
Last edited by Sebas007 on Fri Aug 10, 2007 8:16 am, edited 10 times in total.
Image
Sebas007
SolaraGuy Moderator
SolaraGuy Moderator
 
Posts: 2515
Joined: Thu May 12, 2005 4:03 am
Location: Montreal, QC

Postby Sparky5e » Tue Jul 17, 2007 9:35 pm

Not sure how to get from the trunk to the engine bay. If you figure that out just terminate the ends where the stock locations are. I would probably opt for a ground kit upgrade, saw a link somewhere for it but memory is shot.

As for the battery box I see a few options. First is to have a metal shop bend a new bracket to span the battery. An easier option would be to put some PVC tubes over the long studs to take care of side play. Then use a piece of flat stock across the top to hold it down. You could even weld some tabs to span the battery on the flatstock. Before doing any of that I'd contact Summit, they might have a bracket for the Optima already.
07 SLE Convertable
Blue Streak Metallic
TRD FSTB and RSB, OSB Pedals, OEM Nav, CPE Intake, Stainless sills, "color matching" floor mats
User avatar
Sparky5e
Regular SolaraGuy Member
 
Posts: 151
Joined: Sun May 06, 2007 7:10 am
Location: IL

Postby Sebas007 » Wed Jul 18, 2007 11:35 am

I give it up !!! :-?
Image
Sebas007
SolaraGuy Moderator
SolaraGuy Moderator
 
Posts: 2515
Joined: Thu May 12, 2005 4:03 am
Location: Montreal, QC

Postby adam8080 » Wed Jul 18, 2007 11:46 am

The best way to do it would be to completely remove the stock positive battery cable and replace it with a longer one going directly to the trunk. The only real tough part about it is routing it, but try to follow other wires to get an idea of where to route it. You can ground the battery on anything solid and metal, just make sure you have a nice clean connection there.

Also the alternator is probably hooked directly to the starter. I don't have a wiring diagram to go by, but several other cars have this same setup.

You can get battery cable and the connectors for the end at any auto parts store. It is always better to get a longer cable and cut it to fit than having to splice two different ones together.
Image
adam8080
Regular SolaraGuy Member
 
Posts: 59
Joined: Mon Apr 23, 2007 2:23 pm
Location: Huntsville

Postby michaels artic frost » Wed Jul 18, 2007 11:48 am

Sebas007 wrote:I give it up !!! :-?


^^NO, I know you're not giving up on this bro. I have faith in you. :wink: ^^

-M 8)
Updated 06/01/12: Michael T's
Updated 06/01/12: JUICED! 232whp 294ft/lbs of torque
"Every passing minute is another chance to turn it all around."
User avatar
michaels artic frost
SolaraGuy Moderator
SolaraGuy Moderator
 
Posts: 3965
Joined: Wed Feb 25, 2004 11:17 pm
Location: Kentucky

Postby Sebas007 » Wed Jul 18, 2007 12:15 pm

Thanks adam8080 for the support ! At least it gives me more confidence in me about the "project". I will think about it some more. Will verify where to pass thru the firewall. What is bugging me is the small wire along the stock positive wire that connect in the fuse box I will have to route it also...


Let's calm down and not panic...drilling holes in my car scares me...I cannot help ! :-?
Image
Sebas007
SolaraGuy Moderator
SolaraGuy Moderator
 
Posts: 2515
Joined: Thu May 12, 2005 4:03 am
Location: Montreal, QC

Postby DatSRBoi » Wed Jul 18, 2007 1:44 pm

What I did was I went and brought :

13 feet 0 gauge cable (Might of been longer dont remember)
13 feet 0 gauge cable
3 feet 0 gauge cable

The cables could be brought at most audio stores. I also brought some new bolts and ends that are identical to to the alternator and for a 10mm bolt to be able to go through. First 13 feet cable I replace the old positive points with that and ran it through the firewall like I do for my subs. I ran the second 13 feet cable as the negative replacing all stock points of the car and ran that to the trunk too (You dont really need this but I did it as over kill to make sure the current is close to the engine as posible). Have those two cable plug into the battery as standard. Now the 3rd cable which is the 3 feet will go on the negative. (so youll have two negative, one from the engine bay and the other negative) The other end of that 3 feet cable will be drilled onto a metal contact firewall somewhere in the trunk.

When you run amp for the subs just do it the same way as if the batter is in the front but instead of running a power wire to the front you just connect it to the back trunk where the battery is now.

As for the bracket being too small you can run out to home depot and they sell bars you can buy about the same lenth but flat all the way. then you can get cushion blocks and put them on each side as you tighten them down to keep them from moving.

Hope that helps.
[b][color=red]WARNING: MY SIGNATURE MAY CAUSE SEIZURES![/color][/b]
User avatar
DatSRBoi
Grumpy SolaraGuy
Grumpy SolaraGuy
 
Posts: 5411
Joined: Sat Jul 10, 2004 5:33 pm
Location: DFW Texas

Postby NeFaRiOuS_SLE » Wed Jul 18, 2007 9:07 pm

Actually it goes through a lot of things:

Positive actually splits into 2: First one is actually the starter, then the second one one goes through a 100A relay first, which the relay branches off into about 10 more sections before reaching the alternator (but note one of them DOES connect directly to the alternator after the relay).
NeFaRiOuS_SLE
SolaraGuy Semi-Pro Racer
 
Posts: 3502
Joined: Tue Sep 06, 2005 9:59 am
Location: Diamond Bar, CA

Postby Sebas007 » Thu Jul 19, 2007 5:21 am

Thanks guys...I'll use a mix of many way of your solution.

For the bracket I'll make it sit upside down and use some cutted PVC to stuck the battery on left-right way, front-rear way and the barcket will do it for up-down way. Cut those 4 curvy 0.5" deep bow (the egg's strenght shape) in some PVC piping.

http://www.rbeelectronics.com/wtable.htm
Using this gauge size vs lenght table
I'll run a 2 gauge size wire for positive to the stock positive wire that is already connected to starter.
I'll connect a 2 gauge negative to the frame.
Image
Sebas007
SolaraGuy Moderator
SolaraGuy Moderator
 
Posts: 2515
Joined: Thu May 12, 2005 4:03 am
Location: Montreal, QC

Postby Sebas007 » Sat Jul 21, 2007 4:28 pm

Phase #1

Image

Image

Pass thru the existing hole
Image

Open up the rear driver side panel
Image

Image

Image

Image

Image

Image

It is pretty solid. Doesn't move at all.

Still to do...
Need to put back the carpet (was to hurry to think about it :evil: )
Need to drill the firewall
Need to screw my kill switch
And some connections...
Image
Sebas007
SolaraGuy Moderator
SolaraGuy Moderator
 
Posts: 2515
Joined: Thu May 12, 2005 4:03 am
Location: Montreal, QC

Postby Sebas007 » Sun Jul 22, 2007 5:05 am

little half-bump
Image
Sebas007
SolaraGuy Moderator
SolaraGuy Moderator
 
Posts: 2515
Joined: Thu May 12, 2005 4:03 am
Location: Montreal, QC

Postby Ruski » Sun Jul 22, 2007 7:20 am

looks good.. Keep us updated
Totaled 9-14-07 NEW 6-6-08 04 Se Sport White
Image
User avatar
Ruski
SolaraGuy Semi-Pro Racer
 
Posts: 2238
Joined: Mon Oct 02, 2006 5:38 am
Location: MurderLand

Postby QuickSEV6 » Sun Jul 22, 2007 8:56 am

Image

Here is my relocation.

I was thinking about installing a custom made true cold air intake. The only way to do that is to remove the battery.
I mentioned it to my stereo installer and what you see is the outcome. He said that he didn't like capacitors and he strongly recommended more batteries to supply more power. He squeezed three Optimas into a custom box behind the rear seats. He did a fantastic job.
I'd like to take credit for this work, but I'm not that talented.
Image
User avatar
QuickSEV6
Solara Driver Extraordinaire
 
Posts: 2542
Joined: Mon Jul 04, 2005 12:11 pm
Location: Denton TX

Postby Sebas007 » Sun Jul 22, 2007 6:33 pm

^^^

yeah pretty nice professionnal job !!

I don't know if Gen 1 and Gen 2 are different under the car...it is the important part to be able to screw the rods under the car...

I always see your 7psi in your siganture...and today when looking to my engine bay...I was seeing an S/C...but it was a mirage ! :P
Image
Sebas007
SolaraGuy Moderator
SolaraGuy Moderator
 
Posts: 2515
Joined: Thu May 12, 2005 4:03 am
Location: Montreal, QC

Postby PXLpainter » Sun Jul 22, 2007 7:14 pm

Hey Sebas - I think you need to use MORE Zip-ties!! LOL! :rofl:

Seriously - nice work man! I'll have to do this some day myself... anxious to see your CAI next! :up:
Old CarDomain pages here: http://www.cardomain.com/ride/2247283
So-long to my 2006 SLE Convertible...
Image
User avatar
PXLpainter
Mod Alumni
Mod Alumni
 
Posts: 6442
Joined: Tue Jan 31, 2006 8:31 pm
Location: Ojai, CA
Next

Return to Aftermarket Gen 2 and 2.5

Who is online

Users browsing this forum: No registered users and 9 guests