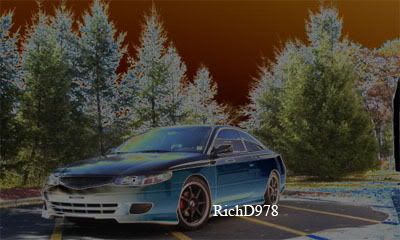
Anti-Sway Bar DIY: Gen 4 Camry Gen 1 Solara
Gen 4 Camry/ES300/Gen 1 Solara Anti-Sway Bar Do It Yourself
Estimated Time Of Completion: ~2.5 hours
Tools / Materials:
hydrolic jack
adjustable jackstands (2)
torque wrench
socket wrench
21mm 6-point deep socket
14mm 6-point shallow socket
12mm 6-point shallow socket
10mm 6-point shallow socket
socket extension
12mm 6-point boxed end wrench
12mm 12-point boxed end wrench
5mm hex wrench
WD-40
Yellow Gasline PTFE Tape (Durable Teflon Tape)

Note: Spray the anti-sway bar links and brackets with WD-40 at least a day before you plan on working, it really helps.
Rear Anti-Sway Bar Removal:
1.Loosen wheel nuts (21mm)
2.Raise the rear of the car (jack up by the dimple in center of frame crossmember)
3.Support with jackstands (at appropriate rigid frame points)
4.Remove rear wheels
5.Remove rear muffler heat sheild (10mm and extension, 3 screws, 1 clip, near middle of car)

6.Disconnect left and right anti-sway bar links from the bar (14mm)
7.Remove the anti-sway bar brackets and bushings (12mm socket)
8.Remove the anti-sway bar
Rear Sway Bars:

Before:


After:


Front Anti-Sway Bar Removal:
1.Loosen wheel nuts (21mm)
2.Raise the front of the car (jack up by the dimple in center of frame crossmember)
3.Support with jackstands (at appropriate rigid frame points)
4.Remove front wheels
5.Disconnect left and right anti-sway bar links from the bar (14mm)
6.Remove the anti-sway bar brackets and bushings (12mm 6-point boxed end wrench for initial loosening, use 12mm 12-point to remove once loose, note this is a very tight space)
7.Remove the anti-sway bar (must remove the bar from the left side of the vehicle, while under the vehicle slide the bar slightly left then push it up into the slight gap available, then proceed to slide it left and out)
Front Sway Bars:

Before:


After:


Installation of your hardware is just the reverse process of removal.
Additional Notes: To prevent bushing binding that results in squeaking, wrap the anti-sway bars with the teflon tape at the bushing mount points.

The 5mm hex wrench can help out if pushing the endlink through the anti-sway bar end is a bit tight, you can use it to thread the endlink through.
When working on the front anti-sway bar, turning the steering wheel left or right can help give you additional clearance and room to work in.
After the car has been lowered back down go ahead and try to tighten up the endlink bolts again, as you will have more clearance to fit your wrench in.
Torque Specifications for installation:
Anti-sway bar links = 29 ft/lbs (same front and rear)
Anti-sway bar brackets = 14 ft/lbs (same front and rear)
Wheel nuts = 80 ft/lbs
A DIY by Gom
Estimated Time Of Completion: ~2.5 hours
Tools / Materials:
hydrolic jack
adjustable jackstands (2)
torque wrench
socket wrench
21mm 6-point deep socket
14mm 6-point shallow socket
12mm 6-point shallow socket
10mm 6-point shallow socket
socket extension
12mm 6-point boxed end wrench
12mm 12-point boxed end wrench
5mm hex wrench
WD-40
Yellow Gasline PTFE Tape (Durable Teflon Tape)

Note: Spray the anti-sway bar links and brackets with WD-40 at least a day before you plan on working, it really helps.
Rear Anti-Sway Bar Removal:
1.Loosen wheel nuts (21mm)
2.Raise the rear of the car (jack up by the dimple in center of frame crossmember)
3.Support with jackstands (at appropriate rigid frame points)
4.Remove rear wheels
5.Remove rear muffler heat sheild (10mm and extension, 3 screws, 1 clip, near middle of car)

6.Disconnect left and right anti-sway bar links from the bar (14mm)
7.Remove the anti-sway bar brackets and bushings (12mm socket)
8.Remove the anti-sway bar
Rear Sway Bars:

Before:


After:


Front Anti-Sway Bar Removal:
1.Loosen wheel nuts (21mm)
2.Raise the front of the car (jack up by the dimple in center of frame crossmember)
3.Support with jackstands (at appropriate rigid frame points)
4.Remove front wheels
5.Disconnect left and right anti-sway bar links from the bar (14mm)
6.Remove the anti-sway bar brackets and bushings (12mm 6-point boxed end wrench for initial loosening, use 12mm 12-point to remove once loose, note this is a very tight space)
7.Remove the anti-sway bar (must remove the bar from the left side of the vehicle, while under the vehicle slide the bar slightly left then push it up into the slight gap available, then proceed to slide it left and out)
Front Sway Bars:

Before:


After:


Installation of your hardware is just the reverse process of removal.
Additional Notes: To prevent bushing binding that results in squeaking, wrap the anti-sway bars with the teflon tape at the bushing mount points.

The 5mm hex wrench can help out if pushing the endlink through the anti-sway bar end is a bit tight, you can use it to thread the endlink through.
When working on the front anti-sway bar, turning the steering wheel left or right can help give you additional clearance and room to work in.
After the car has been lowered back down go ahead and try to tighten up the endlink bolts again, as you will have more clearance to fit your wrench in.
Torque Specifications for installation:
Anti-sway bar links = 29 ft/lbs (same front and rear)
Anti-sway bar brackets = 14 ft/lbs (same front and rear)
Wheel nuts = 80 ft/lbs
A DIY by Gom
Last edited by MentatGom on Fri May 26, 2006 1:56 am, edited 5 times in total.
- MentatGom
- Just Licensed SolaraGuy
- Posts: 48
- Joined: Mon Nov 29, 2004 6:21 pm
- Location: Moreno Valley, CA


