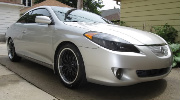
Gen 1 Projector Retrofit
![]() by Akfahad » Sat May 05, 2012 4:23 pm
by Akfahad » Sat May 05, 2012 4:23 pm
First, props to I113GAL and nguyenSTX for answering my questions. Thought I'd throw together a tutorial for putting together some projector retro's in the Gen 1 housing. I did this project after work for about 4-5 days, I'm sure it would take a lot less time, but I didn't have that luxury. As with any project, the biggest factor for me since this was my very first time doing something like this, was to TAKE MY TIME!!!
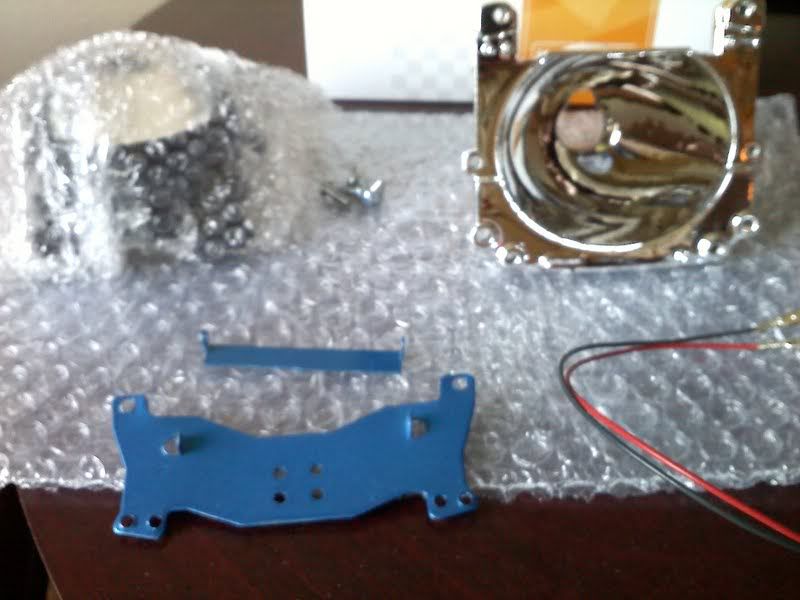
Here's the parts list:
Bi-xenon: Morimoto Mini D2S 2.0 (http://www.theretrofitsource.com/product_info.php?products_id=236) - I decided to do D2S projectors as I wanted to get a different HID kit since I wanted to go with 8000K bulbs, so I scrapped my original McCollugh HID kit
Gatling Gun Shrouds (http://www.theretrofitsource.com/product_info.php?cPath=30&products_id=72)
Bi-xenon: 'MotoControl 9003/H4/HB2 (http://www.theretrofitsource.com/product_info.php?cPath=28&products_id=14027) - this will allow you to tap into the stock headlight connectors
Morimoto CCFL Angel Eyes (http://www.theretrofitsource.com/product_info.php?cPath=31&products_id=103) - definitely not needed if your on a budget, but adds to the effect
Here's the paint I used:
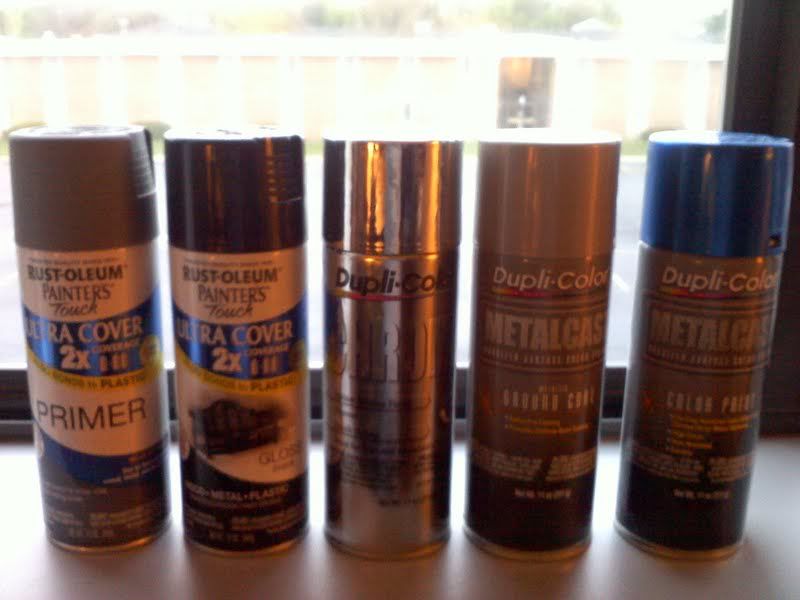
You'll also need a variety of sandpaper, finest grit I used was 220.
Left to right: primer for headlights; gloss black paint for headlights; chrome paint for headlights (original mirror finish pealed off when I masked it to paint the rest of the housing black); primer for shrouds and projector cutoff; blue paint for shrouds and projector cutoff
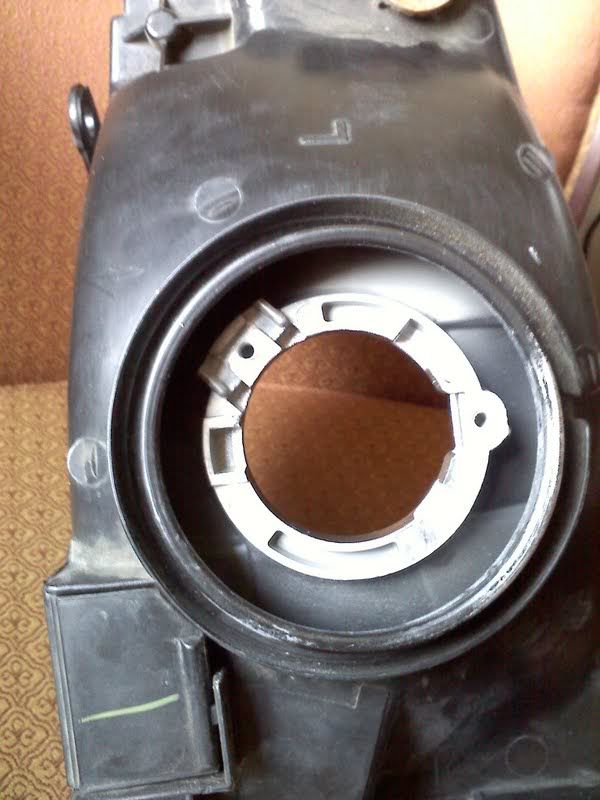
First, take out the headlights, bake them (do a search, there's plenty info on the web on how to effectively heat the headlights to pry the glass off - I used a heat gun since I was in a hotel). remove all the hardware in the housing:
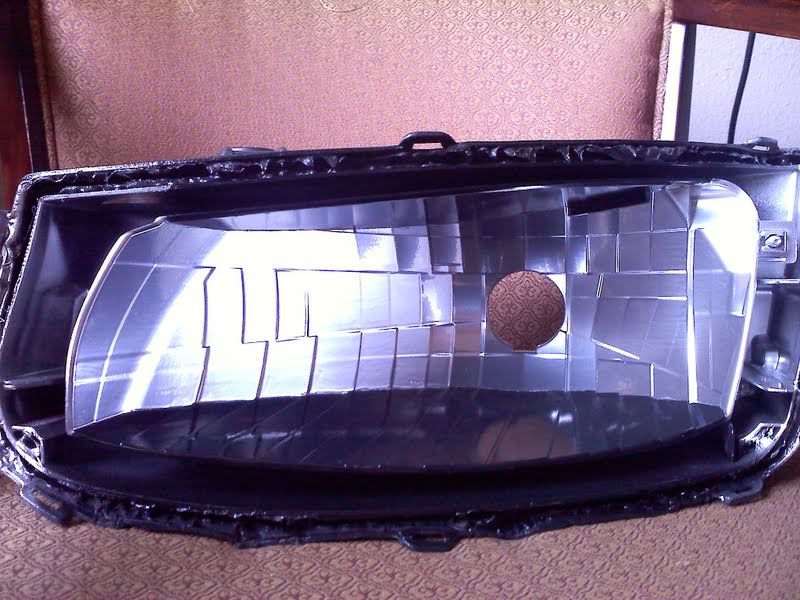
Paint and/or don't paint the housings, whatever you want to do. Here's what I did:
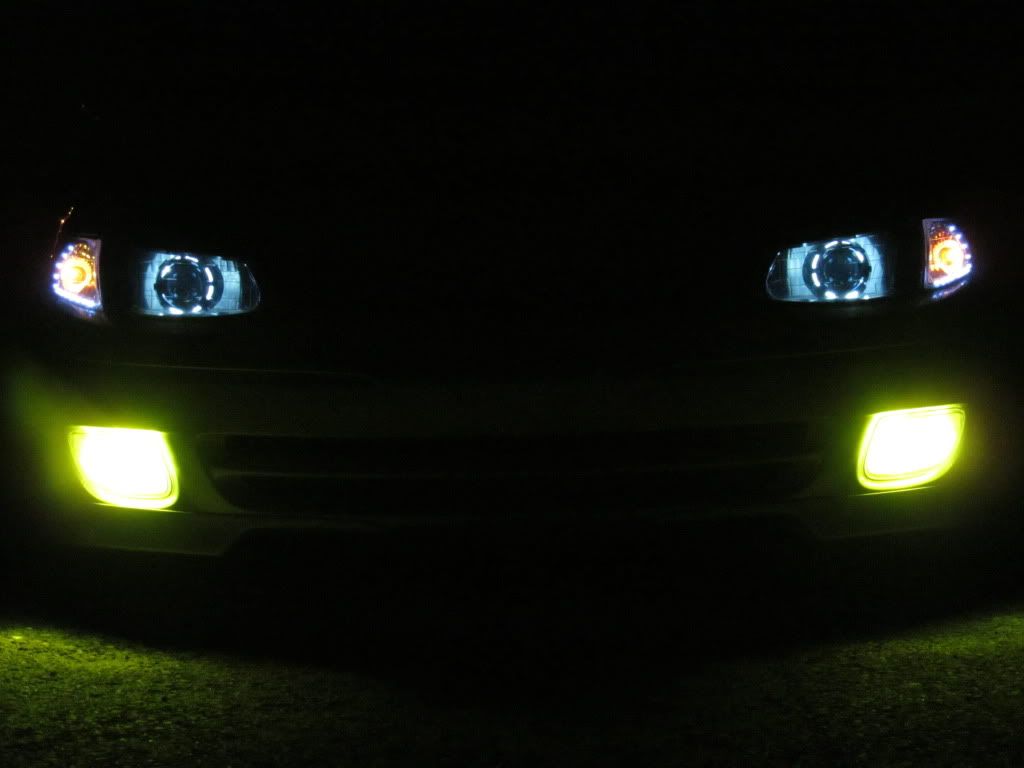
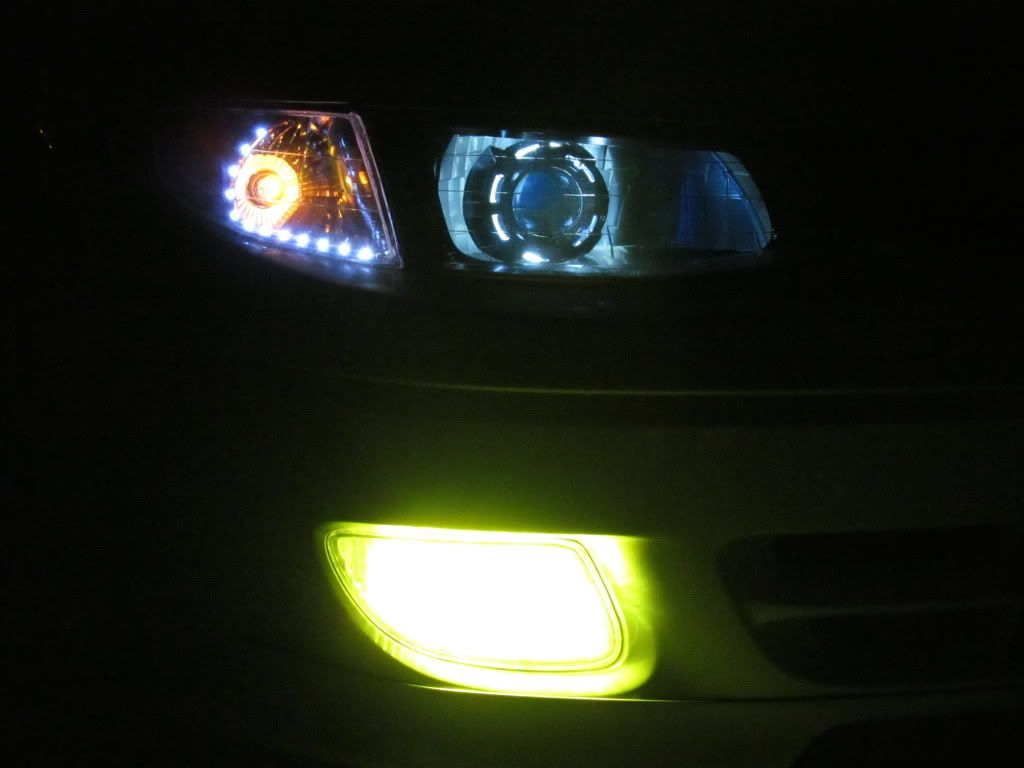
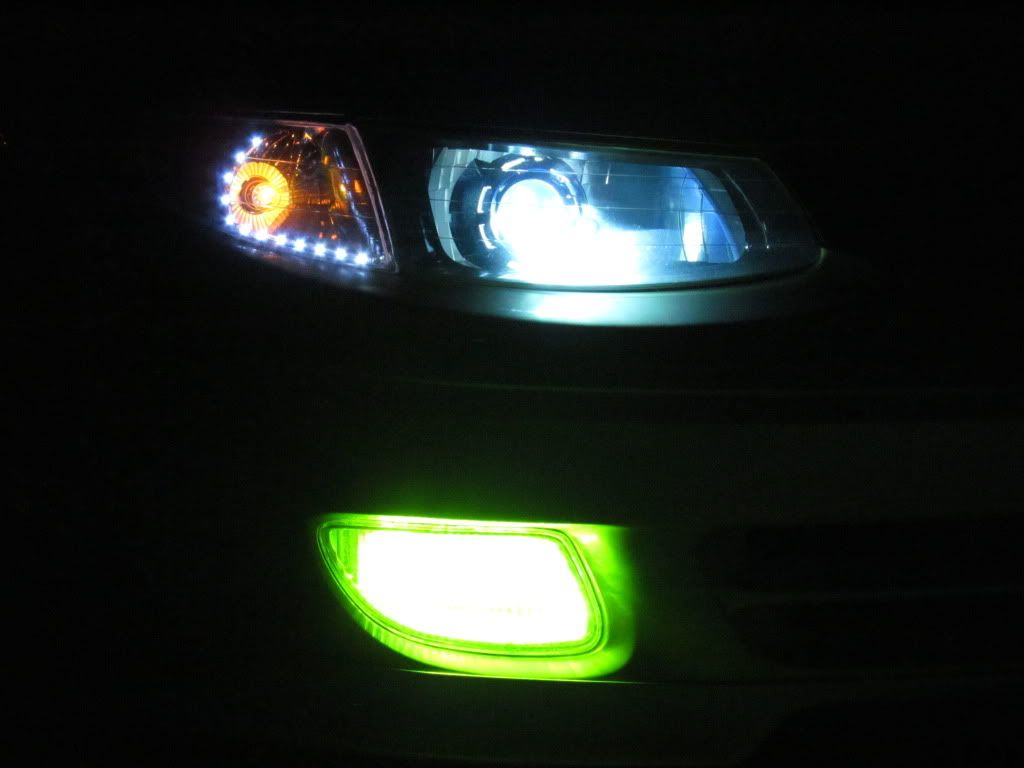
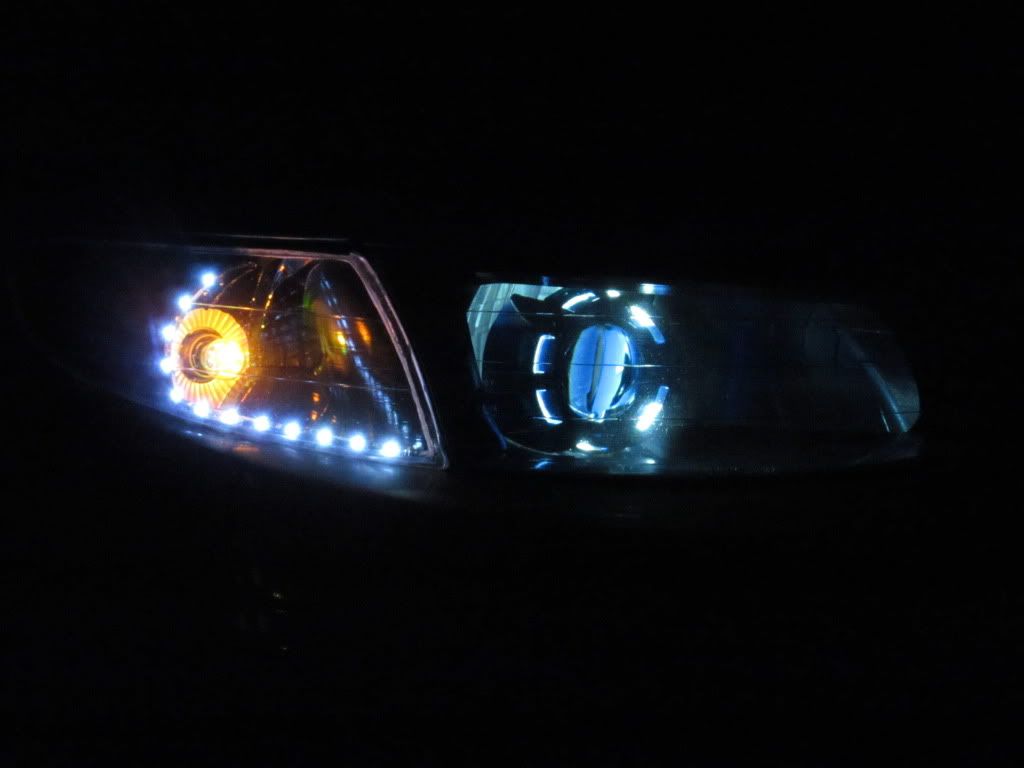
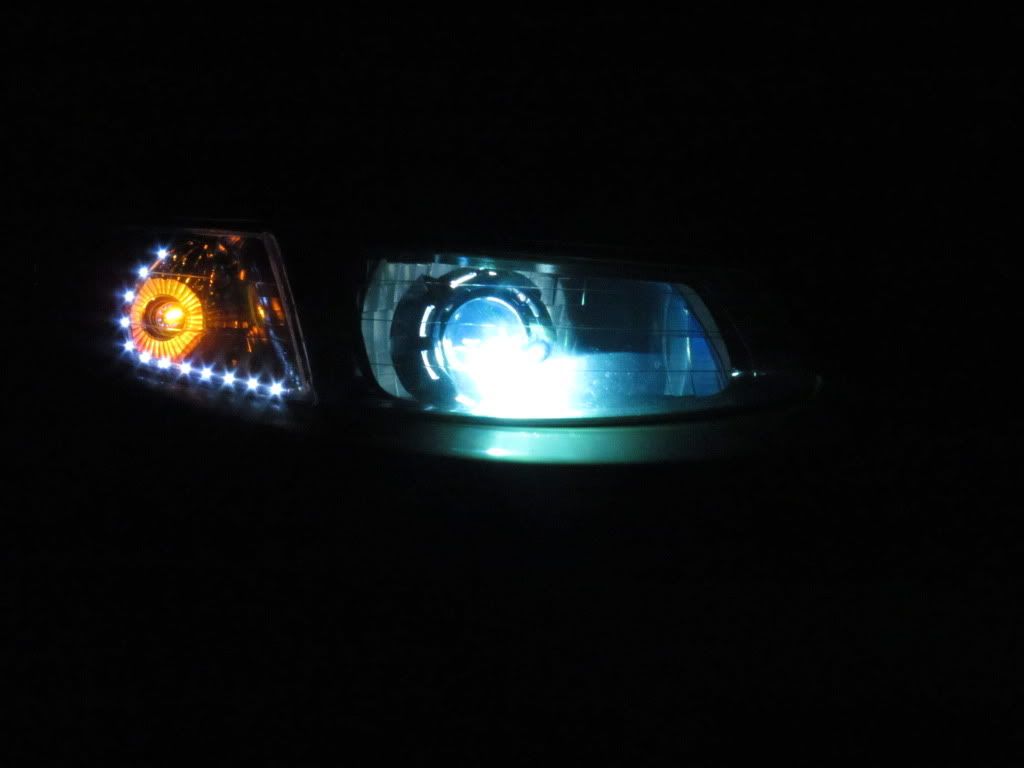
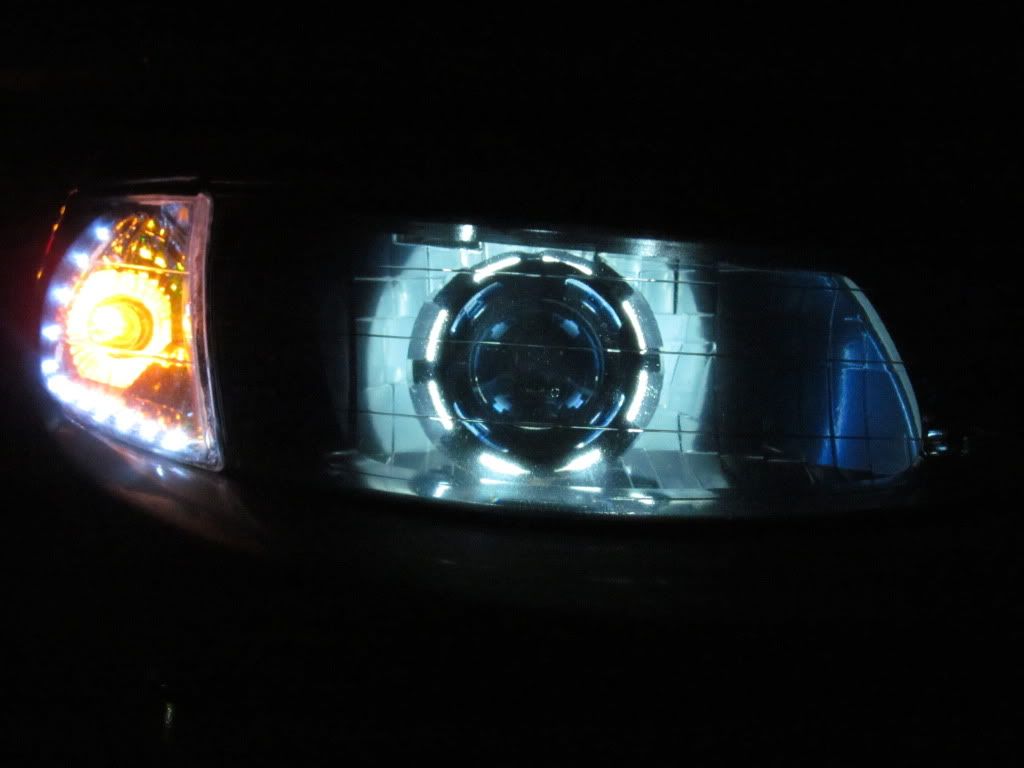
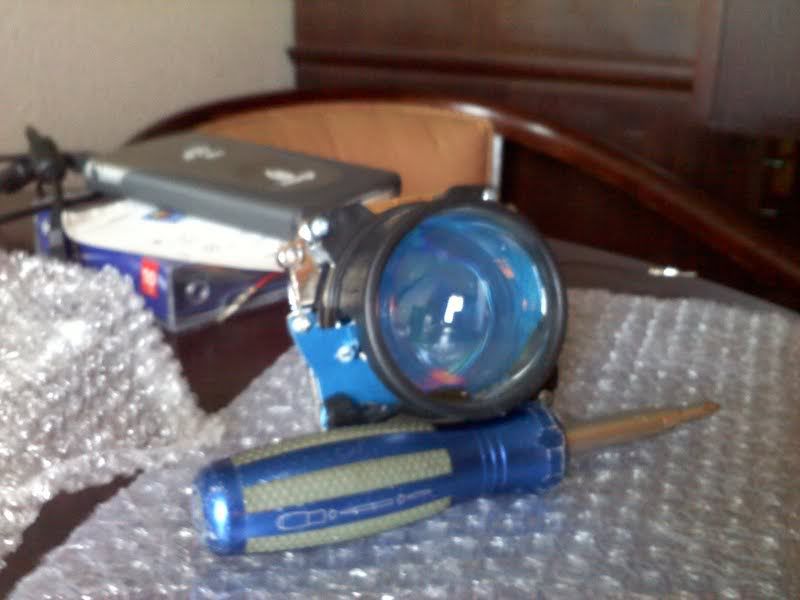
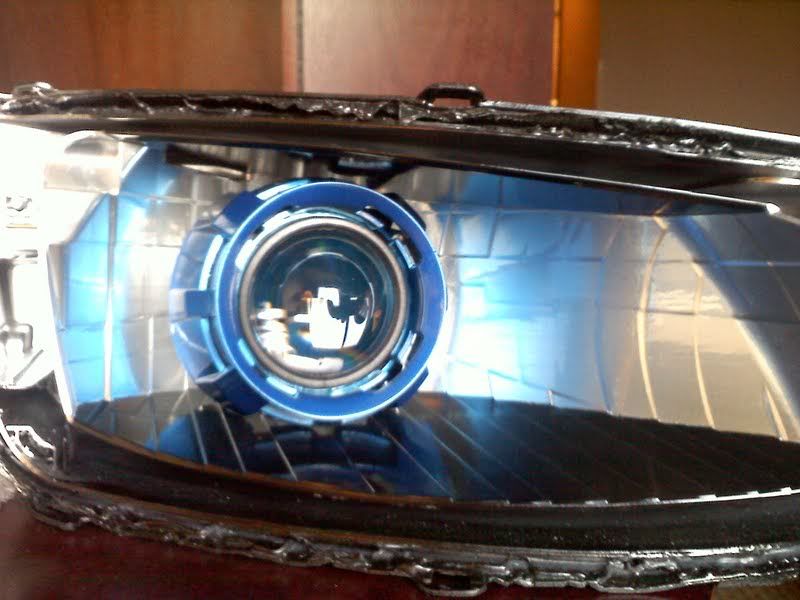
Here's another step you don't have to do, but I disassembled the projector to paint the cutoff shield to obtain a "demon eye" effect (use whatever color you want). Sort of hard to tell with blue but when the light hits it right, its a nice effect.
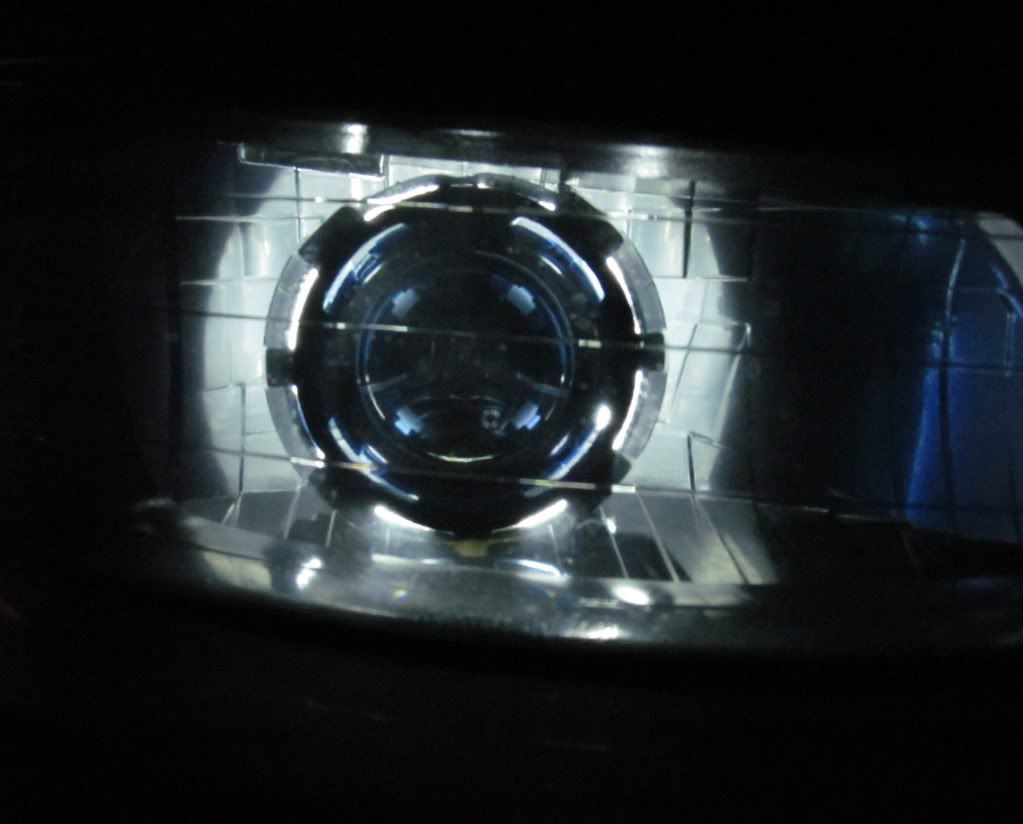
Finished product of the projector re-assembled:
In order to fit the Gatlin Gun shrouds into the housing, you'll need to do some trimming. It was actually more than I expected, but below is how I cut them. Its difficult to notice the cuts once they are set in the housing once complete. Its easiest to use a dremel and drill to do this. The first one takes a while (took about an hour for the first one) but once it fits, just use a permanent marker on the second one, which took 10 minutes to cut once I had the outline. Trick is to do a little at a time, test fit, cut, test fit, cut, etc.
Top of the shroud:
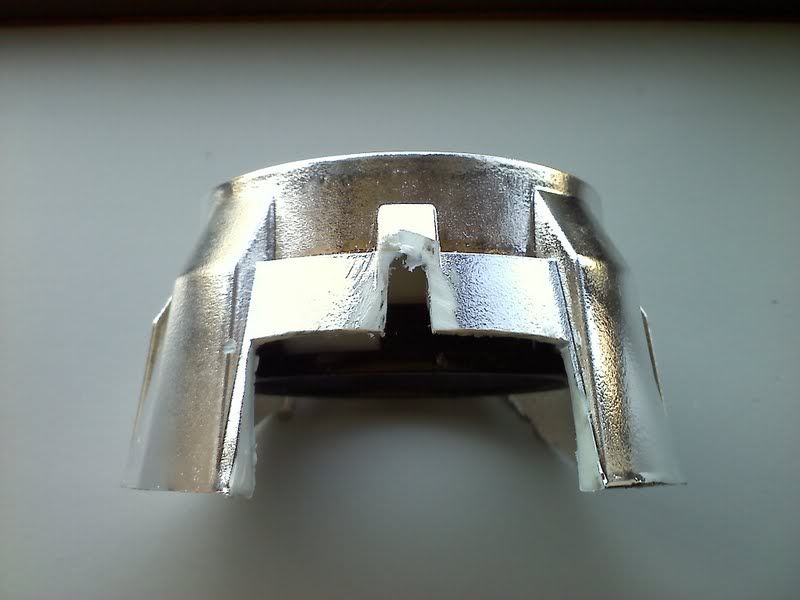
Bottom of the shroud:
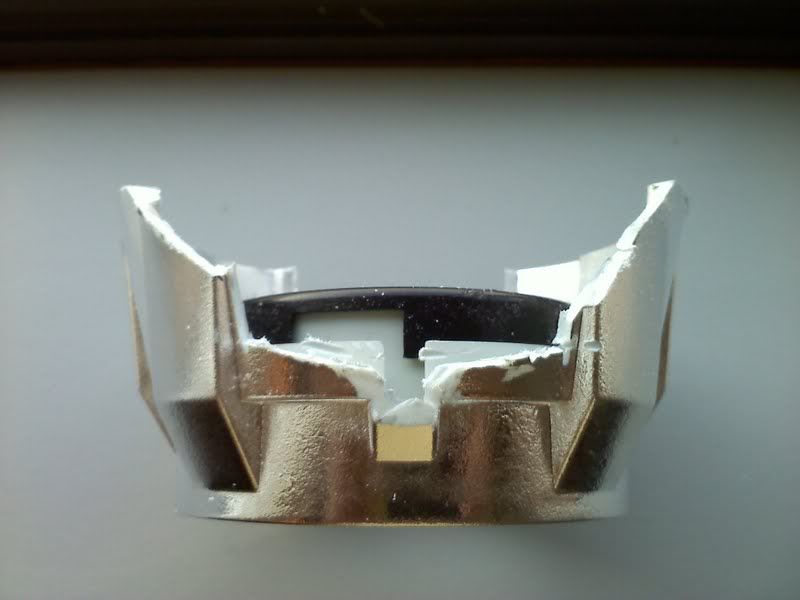
Make sure all surfaces are edged out and smooth.
If you want to do CCFL or LEDs behind whatever shroud you use, here's what I did. Drill a very small hole (as unnoticeable as possible) and use some small speaker wire or the like to tie them down. You don't want to use any glue as they tend to get very hot and will melt and/or smear the color of them. You may notice the wiring I used in the picture.
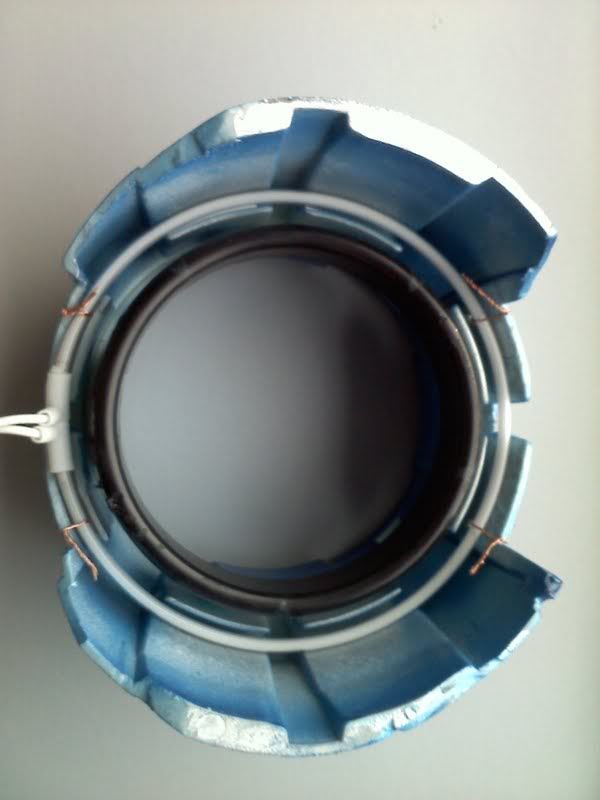
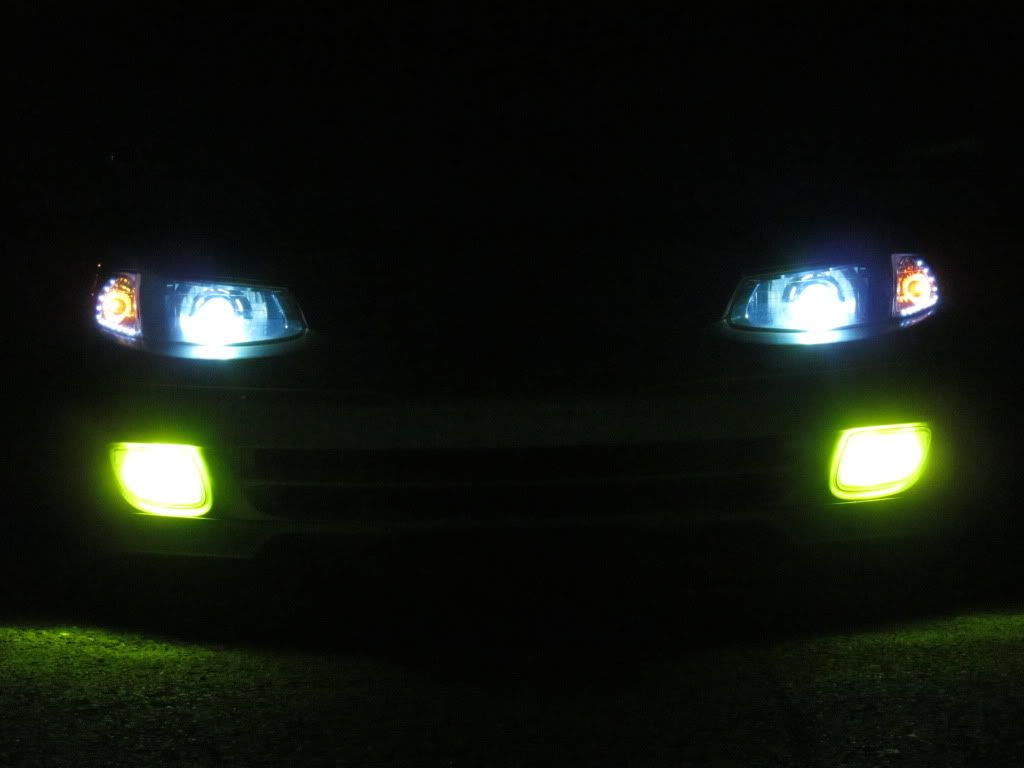
The wiring for the CCFLs I taped into the corner lights (there's three wires - negative is black/white; positive is green/amber), they will not blink when the directionals are on. More nighttime pics on this.
Follow the tutorial on mounting the projector in your housing:
http://www.theretrofitsource.com/trs_tech.php
Here's my shroud painted and glued on the projector (Gatlin Gun shrouds you'll have to glue on the projector) and mounted in the housing:
Since I didn't have an external power source, I tied everything together to make sure everything was functioning before sealing the headlights:
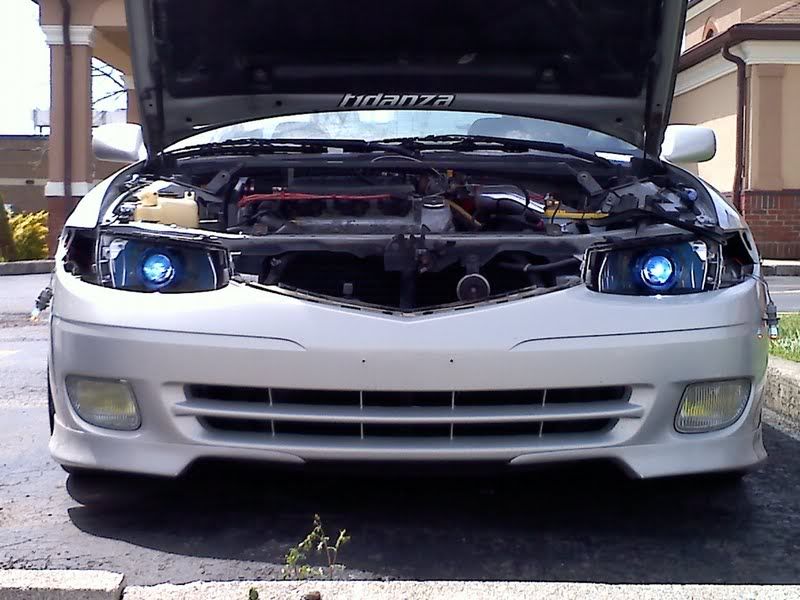
More pictures to come once the headlights are properly sealed and the exteriors are refinished.
Here's the parts list:
Bi-xenon: Morimoto Mini D2S 2.0 (http://www.theretrofitsource.com/product_info.php?products_id=236) - I decided to do D2S projectors as I wanted to get a different HID kit since I wanted to go with 8000K bulbs, so I scrapped my original McCollugh HID kit
Gatling Gun Shrouds (http://www.theretrofitsource.com/product_info.php?cPath=30&products_id=72)
Bi-xenon: 'MotoControl 9003/H4/HB2 (http://www.theretrofitsource.com/product_info.php?cPath=28&products_id=14027) - this will allow you to tap into the stock headlight connectors
Morimoto CCFL Angel Eyes (http://www.theretrofitsource.com/product_info.php?cPath=31&products_id=103) - definitely not needed if your on a budget, but adds to the effect
Here's the paint I used:
You'll also need a variety of sandpaper, finest grit I used was 220.
Left to right: primer for headlights; gloss black paint for headlights; chrome paint for headlights (original mirror finish pealed off when I masked it to paint the rest of the housing black); primer for shrouds and projector cutoff; blue paint for shrouds and projector cutoff
First, take out the headlights, bake them (do a search, there's plenty info on the web on how to effectively heat the headlights to pry the glass off - I used a heat gun since I was in a hotel). remove all the hardware in the housing:
Paint and/or don't paint the housings, whatever you want to do. Here's what I did:
Here's another step you don't have to do, but I disassembled the projector to paint the cutoff shield to obtain a "demon eye" effect (use whatever color you want). Sort of hard to tell with blue but when the light hits it right, its a nice effect.
Finished product of the projector re-assembled:
In order to fit the Gatlin Gun shrouds into the housing, you'll need to do some trimming. It was actually more than I expected, but below is how I cut them. Its difficult to notice the cuts once they are set in the housing once complete. Its easiest to use a dremel and drill to do this. The first one takes a while (took about an hour for the first one) but once it fits, just use a permanent marker on the second one, which took 10 minutes to cut once I had the outline. Trick is to do a little at a time, test fit, cut, test fit, cut, etc.
Top of the shroud:
Bottom of the shroud:
Make sure all surfaces are edged out and smooth.
If you want to do CCFL or LEDs behind whatever shroud you use, here's what I did. Drill a very small hole (as unnoticeable as possible) and use some small speaker wire or the like to tie them down. You don't want to use any glue as they tend to get very hot and will melt and/or smear the color of them. You may notice the wiring I used in the picture.
The wiring for the CCFLs I taped into the corner lights (there's three wires - negative is black/white; positive is green/amber), they will not blink when the directionals are on. More nighttime pics on this.
Follow the tutorial on mounting the projector in your housing:
http://www.theretrofitsource.com/trs_tech.php
Here's my shroud painted and glued on the projector (Gatlin Gun shrouds you'll have to glue on the projector) and mounted in the housing:
Since I didn't have an external power source, I tied everything together to make sure everything was functioning before sealing the headlights:
More pictures to come once the headlights are properly sealed and the exteriors are refinished.
-

Akfahad - SolaraGuy Semi-Pro Racer

- Posts: 2738
- Joined: Tue Jan 28, 2003 9:13 am
- Location: NJ