Yellowing Lights: TurleWax Headlight Lens Restorer Report
![]() by ConejoSolara » Mon Sep 10, 2012 6:57 pm
by ConejoSolara » Mon Sep 10, 2012 6:57 pm
Hello Solara drivers! I'm ConejoSolara, and this is my first post to these forums. Instead of cranking out a ton of questions, I thought it wise to start off my first post as a contribution.
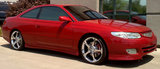
A few days ago, I decided it was time to put a few bucks in to my daily driver, which I've owned since day one in 2001. Everyone else I know has been through 2 generations of vehicles since then, yet my trusty 1st generation Solara just keeps on kicking along. So I thought I'd reward her with a spruce up.
The first thing on the agenda was the headlights. After 11 years of illumination my nighttime path, they'd begun to show severe sun discoloration (yellowing). I was thinking about flat out replacing them, but I'm the type of person who takes immense pride in taking something that's considered "beat" and "used up" and making it better. Not perfect, but definitely better. I bought a box of THIS at the local target, and proceeded to go to work in the hot sun on my head, fog, tail and spoiler lights.
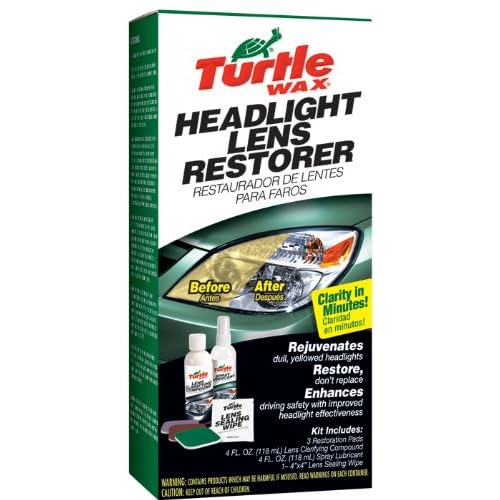
The kit comprises of 3 restoration pads of various grits from 2400 to 8000 grit, Spray Lubricant (4 oz), Lens Clarifying Compound (4 oz), Lens Sealing Wipe (4"x4" swatch), and a plastic glove for hand protection from the sealant.
Most vehicle lights require only the clarifying compound and sealant to remove yellowing and bring back clarity, and mine were no different. The process was actually quite simple, with one exception--taping. I've always hated taping off surfaces, and I kicked myself for doing it in the hot CA sun. Once the lights are taped off, all one has to do is apply the clarifying compound, allow it to dry in to a haze, and buff it out. Rinse repeat. For lights which require a deeper abrasive, Turtlewax includes restoration pads and spray lubricant to use as needed. After the compound has worked off the hazed plastic and has been buffed out, a simple linear back-and-forth with the sealing wipe is required to protect the restored light assembly. The sealant requires approximately 24 hours to cure properly.
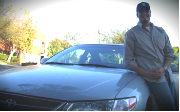
I snapped a few photos of the process with my iPhone before, during and after the process was complete. Unfortunately I only took a few before photos, but most of you Solara drivers out there will know what these probably looked like prior to restoration. All in all, it took me about an hour and a half (I was very thorough, and removed the spoiler light assembly for proper taping) and the results were fantastic. I paid approximately $8 for this kit, and I am pleased with the value/result ratio. I hope you find this information useful!
Before:

During:

After:


A few days ago, I decided it was time to put a few bucks in to my daily driver, which I've owned since day one in 2001. Everyone else I know has been through 2 generations of vehicles since then, yet my trusty 1st generation Solara just keeps on kicking along. So I thought I'd reward her with a spruce up.
The first thing on the agenda was the headlights. After 11 years of illumination my nighttime path, they'd begun to show severe sun discoloration (yellowing). I was thinking about flat out replacing them, but I'm the type of person who takes immense pride in taking something that's considered "beat" and "used up" and making it better. Not perfect, but definitely better. I bought a box of THIS at the local target, and proceeded to go to work in the hot sun on my head, fog, tail and spoiler lights.
The kit comprises of 3 restoration pads of various grits from 2400 to 8000 grit, Spray Lubricant (4 oz), Lens Clarifying Compound (4 oz), Lens Sealing Wipe (4"x4" swatch), and a plastic glove for hand protection from the sealant.
Most vehicle lights require only the clarifying compound and sealant to remove yellowing and bring back clarity, and mine were no different. The process was actually quite simple, with one exception--taping. I've always hated taping off surfaces, and I kicked myself for doing it in the hot CA sun. Once the lights are taped off, all one has to do is apply the clarifying compound, allow it to dry in to a haze, and buff it out. Rinse repeat. For lights which require a deeper abrasive, Turtlewax includes restoration pads and spray lubricant to use as needed. After the compound has worked off the hazed plastic and has been buffed out, a simple linear back-and-forth with the sealing wipe is required to protect the restored light assembly. The sealant requires approximately 24 hours to cure properly.
I snapped a few photos of the process with my iPhone before, during and after the process was complete. Unfortunately I only took a few before photos, but most of you Solara drivers out there will know what these probably looked like prior to restoration. All in all, it took me about an hour and a half (I was very thorough, and removed the spoiler light assembly for proper taping) and the results were fantastic. I paid approximately $8 for this kit, and I am pleased with the value/result ratio. I hope you find this information useful!
Before:
During:
After:
--
"ConejoSolara"
01' Camry Solara SE
2.2L L4 DOHC 16V
"ConejoSolara"
01' Camry Solara SE
2.2L L4 DOHC 16V
-
ConejoSolara - Just Licensed SolaraGuy
- Posts: 2
- Joined: Mon Sep 10, 2012 5:58 pm
- Location: Thousand Oaks, CA