Re: Broken Side Mirror (Gen 2)
![]() by 2KAVXLS » Tue May 01, 2012 4:48 am
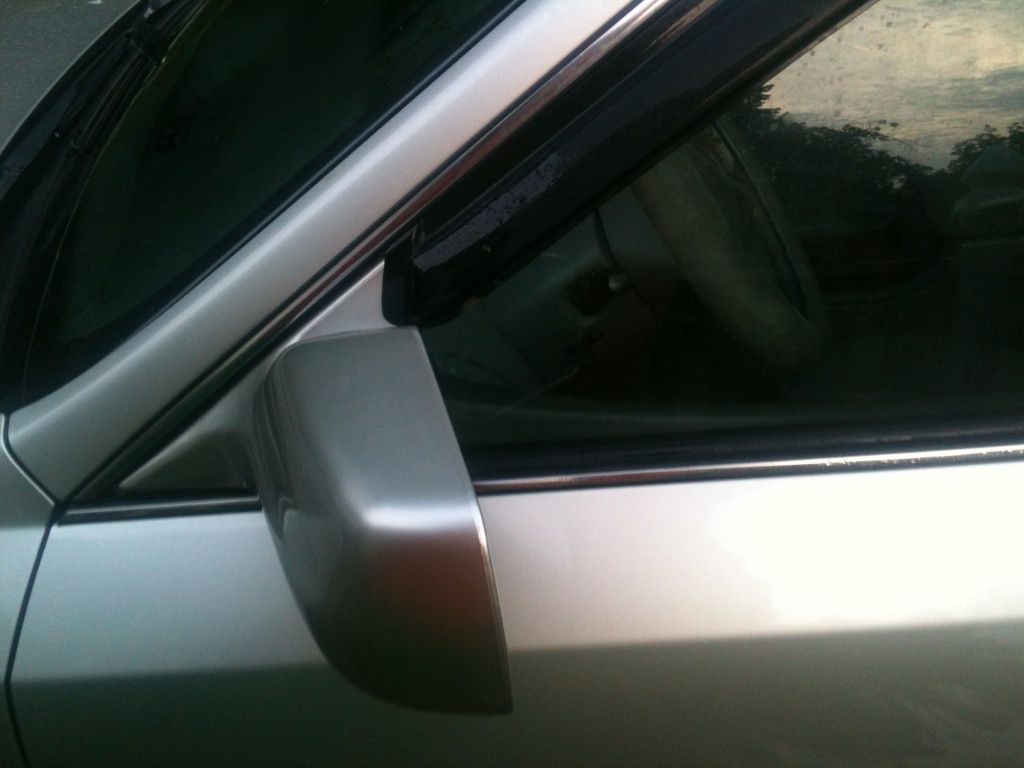
by 2KAVXLS » Tue May 01, 2012 4:48 am
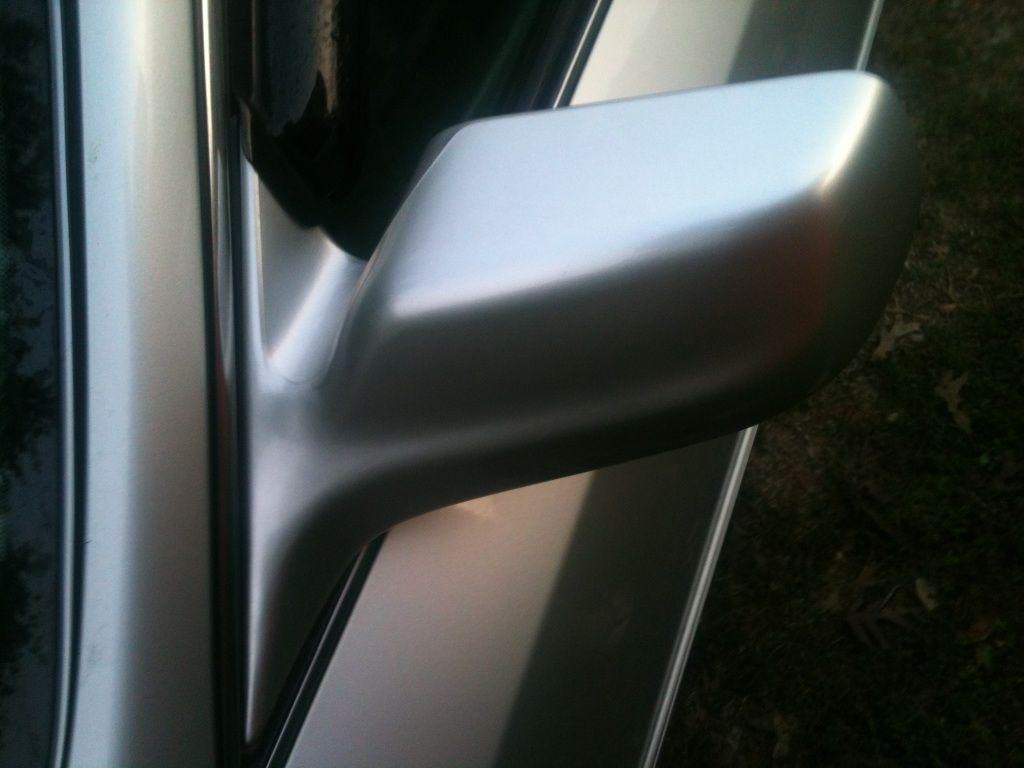
Hey all! I know none of you know me, but I post on TN and I check here and read posts and what not. Anyways, I recently ran into this with my 2000 Avalon XLS when my wife decapitated the drivers mirror of my Avalon on a chain-link fence end post(luckily that was all she hit). I know it's not a Solara, but my experience could help you. I got on RockAuto and bought the correct aftermarket replacement for my car. Looks entirely identical to what it replaced. Look it up by application and it's listed under Body-Exterior Outside Door Mirror. The factory Lunar Mist is three stage, but the cans that you get by Dupli-Color at Advance that are their version of Lunar Mist come so close you'd barely notice. I'd bet most people couldn't tell a difference if they looked....if they stared for quite a while then maybe. Anyways....get yourself 1 can of that(store clerk can look it up for you since I don't have the can with me or I'd give you the PN. Also get a can of adhesion promoter for plastics, and a can of the automotive clear coat by Dupli-Color or go to an automotive paint supply shop and buy real clear with the appropriate hardener in the bottom of the can that you have to activate(it will look identical this way, but the Dupli-Color gets it real close especially if you lay it down good. Make sure to sand back the slick black finish on the mirror just to rough it up... don't use anything too abrasive on plastic as it will gouge(I used 2000 grit and make several light passes). Then clean it up with alcohol. Mask the portion that bolts to the car(black part) before sanding to avoid accidentally marking it with sandpaper. Mask up and then position the mirror portion so that you can paint all applicable area's that can be seen when normally looking at the mirror(looking at it you'll figure out where to position it in order to paint it without removing the mirror portion. Once that's done give it two or three coats of adhesion promoter and let that flash according to the directions on the can nothing too heavy or it will run. Then give it 4 coats of color getting progressively wetter each coat until the final is a wet coat, but not wet enough to run and let it flash according to the can(should use about half of the can on this), then on with the clear..I would do about 4 coats of clear just follow the instructions on the can for flash times. Don't breathe the fumes(wear a cheap mask), and paint in a well ventilated area preferably in a garage or somewhere that's not directly outside(keeps down on bug contamination), and cover anything that you don't want metal flake over-spray on because it will fly everywhere in the immediate area. Long post I know, but doing this myself I spent about $70.00 and the mirror looks so good that nobody would give it a second glance. Did it myself in about 3.5 hours or so and let it cure for a week before putting it on the car. If you lay down the clear right you won't have to wet sand the finish it will come out perfect. Also little tip(put all the paint cans in a pan of hot water and let them soak in the water until just prior to spraying. The paint goes on so smooth being warm(remember to wipe off the can before spraying anything from it though). This mirror has weathered the 1.5 years since the incident and it still looks as good today as it did the day I installed it. Here are a few pics, but it matches pretty well to the 12 year old factory paint.
Sorry for the long post, but I hope it will help you(or someone else) that may come across it and want to DIY this and save $$$
Jeff
Sorry for the long post, but I hope it will help you(or someone else) that may come across it and want to DIY this and save $$$
Jeff
- 2KAVXLS
- Just Licensed SolaraGuy
- Posts: 3
- Joined: Tue May 01, 2012 4:03 am