Supercharger Oil Change Pics
![]() by Eye8Pussies » Sat Feb 02, 2008 5:25 pm
by Eye8Pussies » Sat Feb 02, 2008 5:25 pm
This thread is just for some posts and tips for ppl who are planning on changing their own oil- it's really simple as long as you can take off your blower yourself.
and I just saw QuickSEV6's thread with the posted TRD instructions as well, which would probably help as well: http://www.solaraguy.org/viewtopic.php?t=37833
Since the whole process is pretty much self-explanatory...these pictures are mostly to give guidance and confidence to ppl
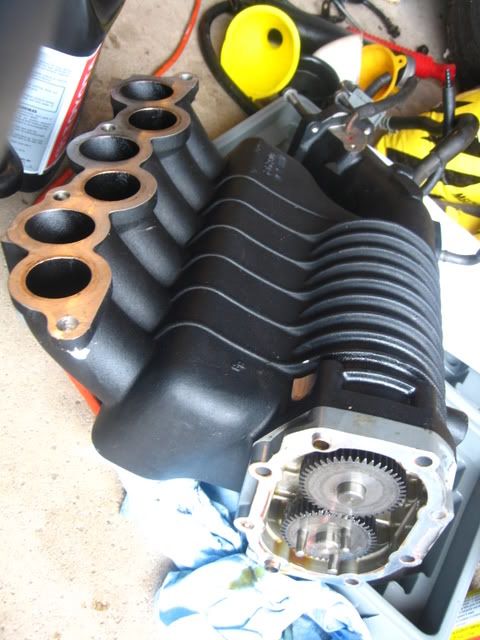
Supercharger with nose removed:
Here's the nose:
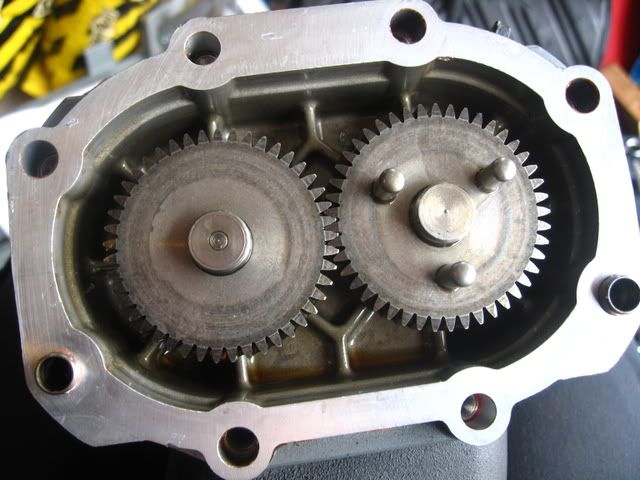
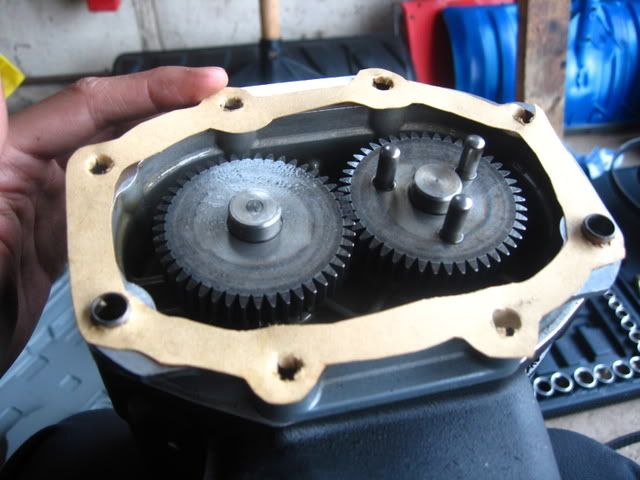
Here's the blower/gear side with all the old gasket material cleaned off
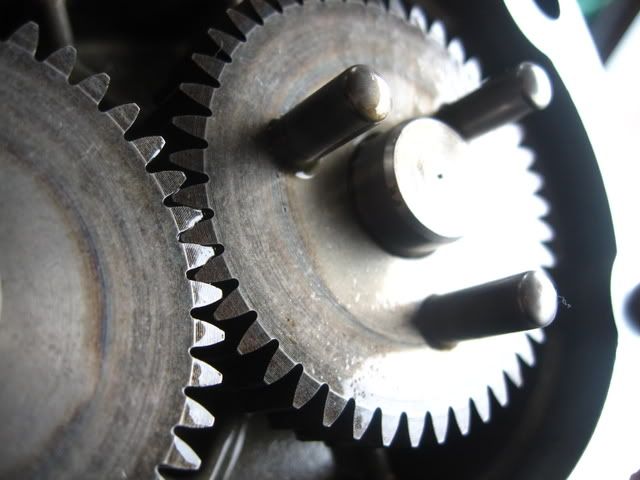
Here's a close-up of the gears:
I only took this pic as a visual because the nose on this blower (the solara) had been leaking for some time now and there was very little oil left in the nose. This was to show that despite the low oil, the gears were unaffected.
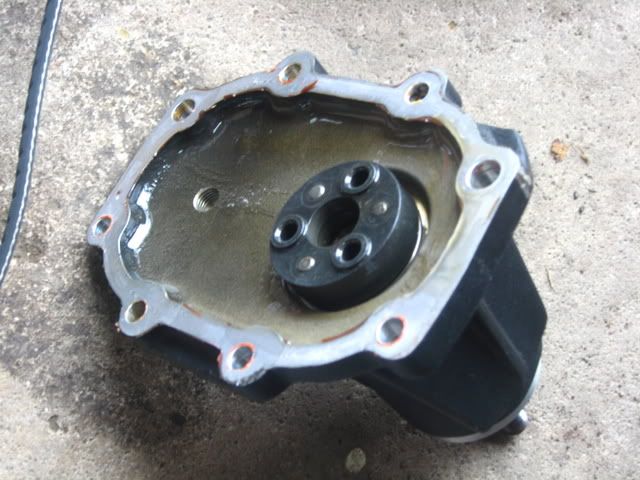
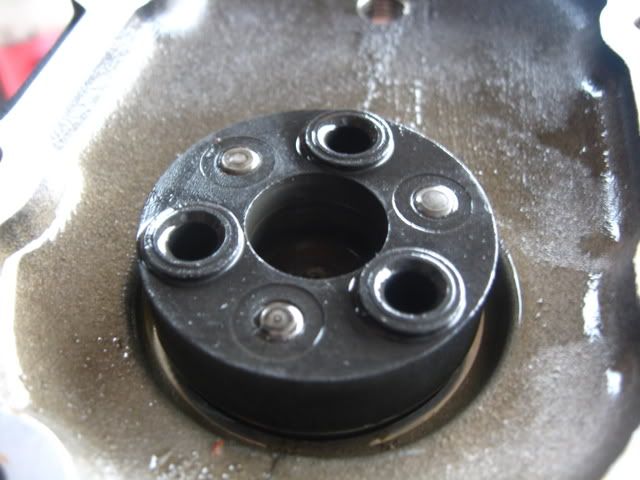
Here's a close-up of the coupler:
The solara had 107K miles on it when I picked it up, and by the time that I did this work (along with a timing belt change, seals, water pump, etc.) the car was at 111K miles. I presume that the blower had been on the car for the majority of the time since it is the old non-tensioner idler assembly and everything else on the car had also been done/installed at a dealership, so I had expected to have to change the coupler as well with a "high performance" nitrile one that I have sitting around. But as one can see, the coupler was in perfect shape, though the oil was on the dark side.
So I'm not sure if the blower had been serviced before. On one hand, it seemed possible, hence the leaking s/c oil, probably due to a bad seal/ But I also don't see why he would change the oil/coupler on the blower without also do major maintenance such as change the timing belt at 90-95K.
Regardless though, the coupler was in perfect condition, no jiggling, etc and the blower makes no noise than it should at idle, so I left it.
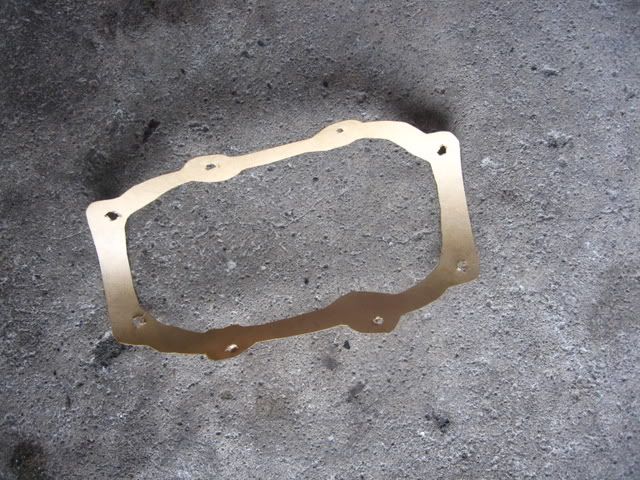
The paper gasket for the nose:
Because I was unable to find anaerobic gasket sealer for the nose and I was on a deadline for getting the blower back together and the timing belt done for my sister to go to work the next morning (also that I've had bad experiences with anaerobic gasket maker when I made my custom fitting for my FPR on my camry- it has a really hard time drying perfectly without leaks), the best option (and I trust more) is using a paper gasket- perfect for machined surfaces (on my FPR bracket, I ended up using cork, which is safe for use with fuel- paper is not). It was a 5 minute tracing and cutting job. It doesn't have to be perfect.
Here is the gasket on the nose:
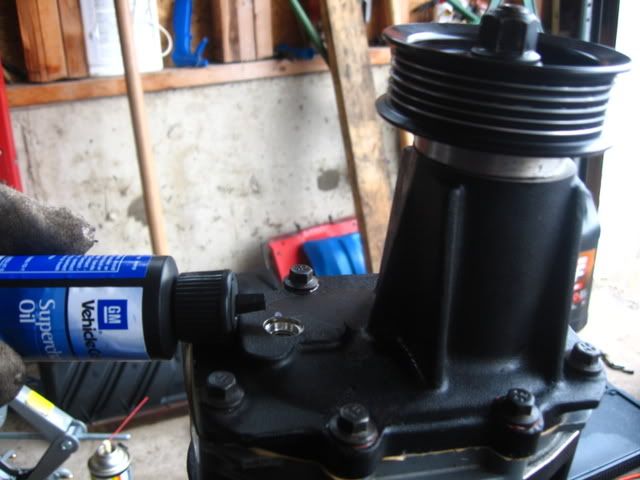
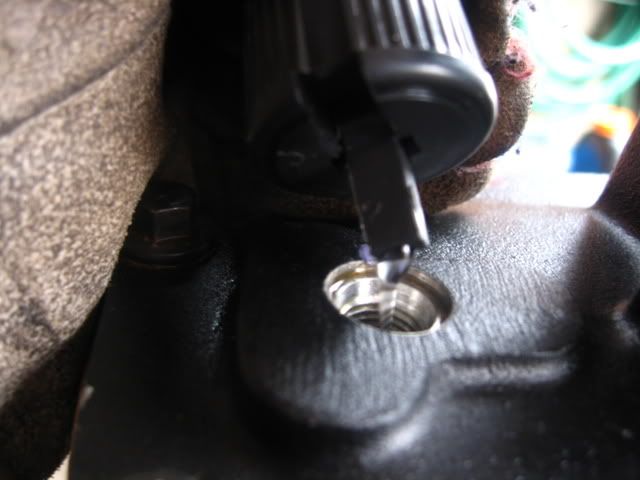
And then filling the oil back up:
4oz still seem so little to me- you'll see what I mean when/if you do it yourself, and since I had several bottles sitting around, I put 6oz in just to make myself happy. Also, just for in case it leaks if the paper gasket doesn't work well, and I'd have more leeway time-wise before I had to take it off and re-seal it.
As an extra precaution, when I resealed the nose, I used red high-temp RTV sealant on the bolts to prevent possible leakage, since that's where the typical leak seem to come from- especially the one bottom rear bolt where the grounding wire goes (despite the design of the blower to prevent leaking).
I'm happy to say that when I checked 2 weeks later though, there was no apparent leaks from the nose, and after changing a number of pullies on the supercharger assembly (at this point, all the pullies and the belt has been changed since I bought up the car) the car/blower runs like new.
I hope this helps anybody who has questions or doubts about doing the oil change themselves. It's a cinche. As long as you have no qualms about taking your blower off.
And as an off note- for people who plan to do this while doing their timing belt- keep the blower off. It'll make your life ALOT easier. With the blower in the way, the wiring harness cannot be moved out of the way and you'll have one helluva time aligning the rear cam timing mark- I learned the hard way. lol.
and I just saw QuickSEV6's thread with the posted TRD instructions as well, which would probably help as well: http://www.solaraguy.org/viewtopic.php?t=37833
Since the whole process is pretty much self-explanatory...these pictures are mostly to give guidance and confidence to ppl
Supercharger with nose removed:
Here's the nose:
Here's the blower/gear side with all the old gasket material cleaned off
Here's a close-up of the gears:
I only took this pic as a visual because the nose on this blower (the solara) had been leaking for some time now and there was very little oil left in the nose. This was to show that despite the low oil, the gears were unaffected.
Here's a close-up of the coupler:
The solara had 107K miles on it when I picked it up, and by the time that I did this work (along with a timing belt change, seals, water pump, etc.) the car was at 111K miles. I presume that the blower had been on the car for the majority of the time since it is the old non-tensioner idler assembly and everything else on the car had also been done/installed at a dealership, so I had expected to have to change the coupler as well with a "high performance" nitrile one that I have sitting around. But as one can see, the coupler was in perfect shape, though the oil was on the dark side.
So I'm not sure if the blower had been serviced before. On one hand, it seemed possible, hence the leaking s/c oil, probably due to a bad seal/ But I also don't see why he would change the oil/coupler on the blower without also do major maintenance such as change the timing belt at 90-95K.
Regardless though, the coupler was in perfect condition, no jiggling, etc and the blower makes no noise than it should at idle, so I left it.
The paper gasket for the nose:
Because I was unable to find anaerobic gasket sealer for the nose and I was on a deadline for getting the blower back together and the timing belt done for my sister to go to work the next morning (also that I've had bad experiences with anaerobic gasket maker when I made my custom fitting for my FPR on my camry- it has a really hard time drying perfectly without leaks), the best option (and I trust more) is using a paper gasket- perfect for machined surfaces (on my FPR bracket, I ended up using cork, which is safe for use with fuel- paper is not). It was a 5 minute tracing and cutting job. It doesn't have to be perfect.
Here is the gasket on the nose:
And then filling the oil back up:
4oz still seem so little to me- you'll see what I mean when/if you do it yourself, and since I had several bottles sitting around, I put 6oz in just to make myself happy. Also, just for in case it leaks if the paper gasket doesn't work well, and I'd have more leeway time-wise before I had to take it off and re-seal it.
As an extra precaution, when I resealed the nose, I used red high-temp RTV sealant on the bolts to prevent possible leakage, since that's where the typical leak seem to come from- especially the one bottom rear bolt where the grounding wire goes (despite the design of the blower to prevent leaking).
I'm happy to say that when I checked 2 weeks later though, there was no apparent leaks from the nose, and after changing a number of pullies on the supercharger assembly (at this point, all the pullies and the belt has been changed since I bought up the car) the car/blower runs like new.
I hope this helps anybody who has questions or doubts about doing the oil change themselves. It's a cinche. As long as you have no qualms about taking your blower off.
And as an off note- for people who plan to do this while doing their timing belt- keep the blower off. It'll make your life ALOT easier. With the blower in the way, the wiring harness cannot be moved out of the way and you'll have one helluva time aligning the rear cam timing mark- I learned the hard way. lol.
HaHa

__________________
Ripped...and the girls are loving it.
__________________
Ripped...and the girls are loving it.
- Eye8Pussies
- SolaraGuy Street Racer

- Posts: 1662
- Joined: Thu Mar 09, 2006 9:35 am