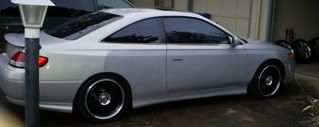
ACIS from "Nyyankee351" tutorial this is pictures.
Are righty i just loaded the pictures finally.
Link to his tutorial: http://www.solaraguy.org/viewtopic.php?t=23181
Sorry if these pictures are big.
1. Remove the valve cover.

You will see the 2 hex bolts, unscrew those, i think they are 6mm or 8mm.
2. Locate the black/gray canister under the battery tray.
 [url]
[url]
3. You will see 2 rubber hoses from the canister under the battery.

You will see it runs along the the front of the engine near the oil cap, and tranny dipstick.
4. Then you will see the most front rubber tube run to a metal tube near the intake manifold.

In this case you see it behind the black wire loom near the zip tie.
5. Then look at all the metal tubin' that run along wit the fuel rail. You will see a metal tube that make a little "u"; it the upper most metal tube in the picture. It goes under the black bundle of wires that split to a "Y".

6. Then you see the left side of all the rubber tubes, near the spark plug wire bundle. [Before]

7. Then this is what it looks like after you are done.

You can see that i looped the tubes like i did.
8. Then when you have re-routed the rubber hoses, your all done.
Before:


After:


You will notice that the little arm swings forward toward the yellow screw after you are done.
Then you put hte valve cover back on when you are done, or leave it off, it's up to you.
When you take your car out for a lil spin after you are done, you will notice it is more smooth when the car pulls in 2nd gear if you're an slushbox.
If you need any help let me know and "Nyyankee351".[/url]
Link to his tutorial: http://www.solaraguy.org/viewtopic.php?t=23181
Sorry if these pictures are big.
1. Remove the valve cover.

You will see the 2 hex bolts, unscrew those, i think they are 6mm or 8mm.
2. Locate the black/gray canister under the battery tray.
 [url]
[url]
3. You will see 2 rubber hoses from the canister under the battery.

You will see it runs along the the front of the engine near the oil cap, and tranny dipstick.
4. Then you will see the most front rubber tube run to a metal tube near the intake manifold.

In this case you see it behind the black wire loom near the zip tie.
5. Then look at all the metal tubin' that run along wit the fuel rail. You will see a metal tube that make a little "u"; it the upper most metal tube in the picture. It goes under the black bundle of wires that split to a "Y".

6. Then you see the left side of all the rubber tubes, near the spark plug wire bundle. [Before]

7. Then this is what it looks like after you are done.

You can see that i looped the tubes like i did.
8. Then when you have re-routed the rubber hoses, your all done.
Before:


After:


You will notice that the little arm swings forward toward the yellow screw after you are done.
Then you put hte valve cover back on when you are done, or leave it off, it's up to you.
When you take your car out for a lil spin after you are done, you will notice it is more smooth when the car pulls in 2nd gear if you're an slushbox.
If you need any help let me know and "Nyyankee351".[/url]
2000 Solara SE auto V6. Diamond White Pearl.
Top Speed Run finished at 130 mph.
Too many modifcations for the signature.
Top Speed Run finished at 130 mph.
Too many modifcations for the signature.
-

SleeperSolara - SolaraGuy Hall of Famer

- Posts: 9257
- Joined: Tue Jun 15, 2004 11:38 am
- Location: The 405


